Install Tiny Webcasts on Windows
Users of the Windows operating system should install Tiny Webcasts using the Docker image provided. Therefore, installing Tiny Webcasts is a two-step process:
Download and install Docker for Windows
Download and install Tiny Webcasts
Download and install Docker for Windows
In order to build and use the Docker image provided with “Tiny Webcasts”, you need to install Docker for your platform. Follow the instructions on the Docker website and make sure your Docker installation is working.
There is a detailed and step-by-step guide for the Docker installation for Windows available on the official Docker website. Expect to download a larger file (probably more than one Gigabyte). However, it is worth it, as you can use Docker for many other things as well.
Once you’ve downloaded and installed Docker, test that everything is well setup and working. To do so, open a terminal and type the following into it (and afterwards, hit the “Enter” key):
docker run hello-world
This should usually present you with a welcome message and tell you that your Docker installation was successful and everthing seems working.
If however you see some error messages, refer to the official Docker documentation and trouble-shoot accordingly.
Note
If you don’t know or can’t remember how to open a terminal (also sometimes named “command line window” or “command prompt”), see the Frequently Asked Questions page. There, you will even find screenshots.
Windows users may need to manually activate some virtualisation features in their BIOS.
Important
Please refer to the information available on the Docker website for any questions regarding the installation of Docker for your platform. There will be no support by the authors of “Tiny Webcasts” regarding those questions.
Download and install Tiny Webcasts
The Tiny Webcasts command-line tools used for creating the webcasts can be obtained from GitHub. Just download and unpack the project from there:
Note
Instead of simply downloading the master branch, it might be advisable to look at the releases and download the latest (stable) release.
For those interested in a more graphical approach:
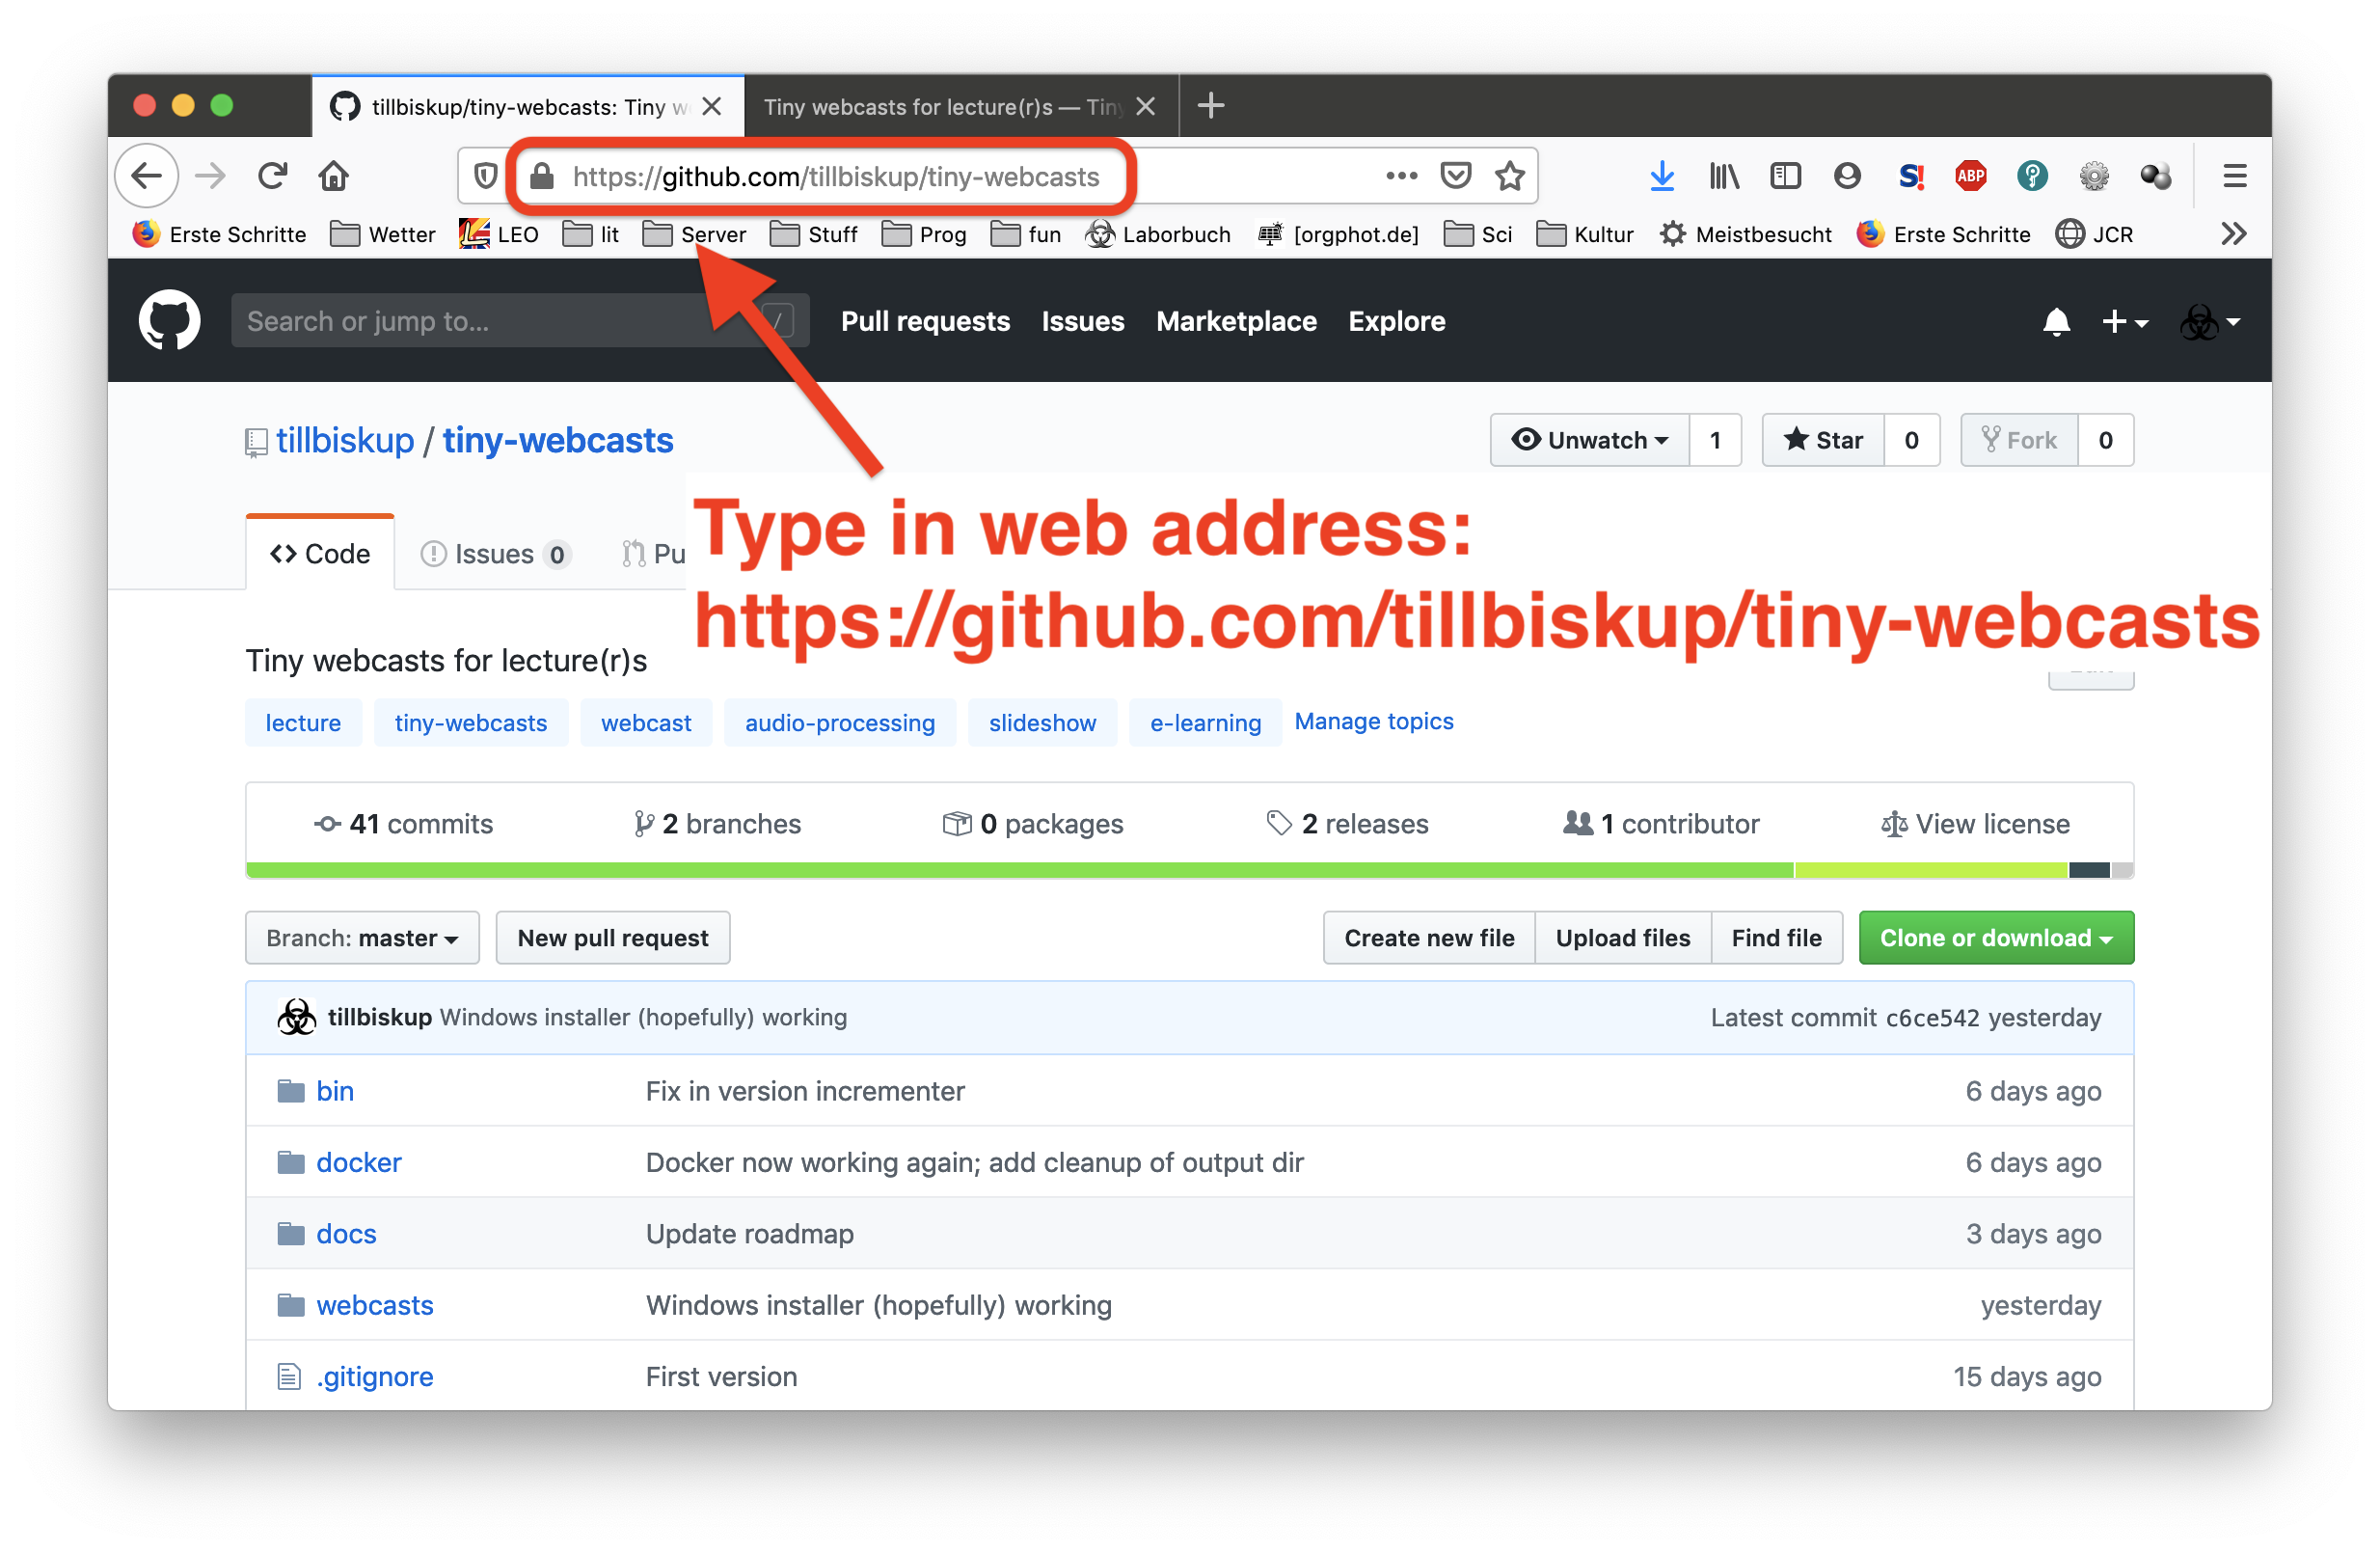
Fig. 1 Open the GitHub webpage for Tiny Webcasts in your favourite browser. Therefore, start your browser, simply type https://github.com/tillbiskup/tiny-webcasts into its address bar, and hit the Enter key. This should open the respective webpage as shown here.
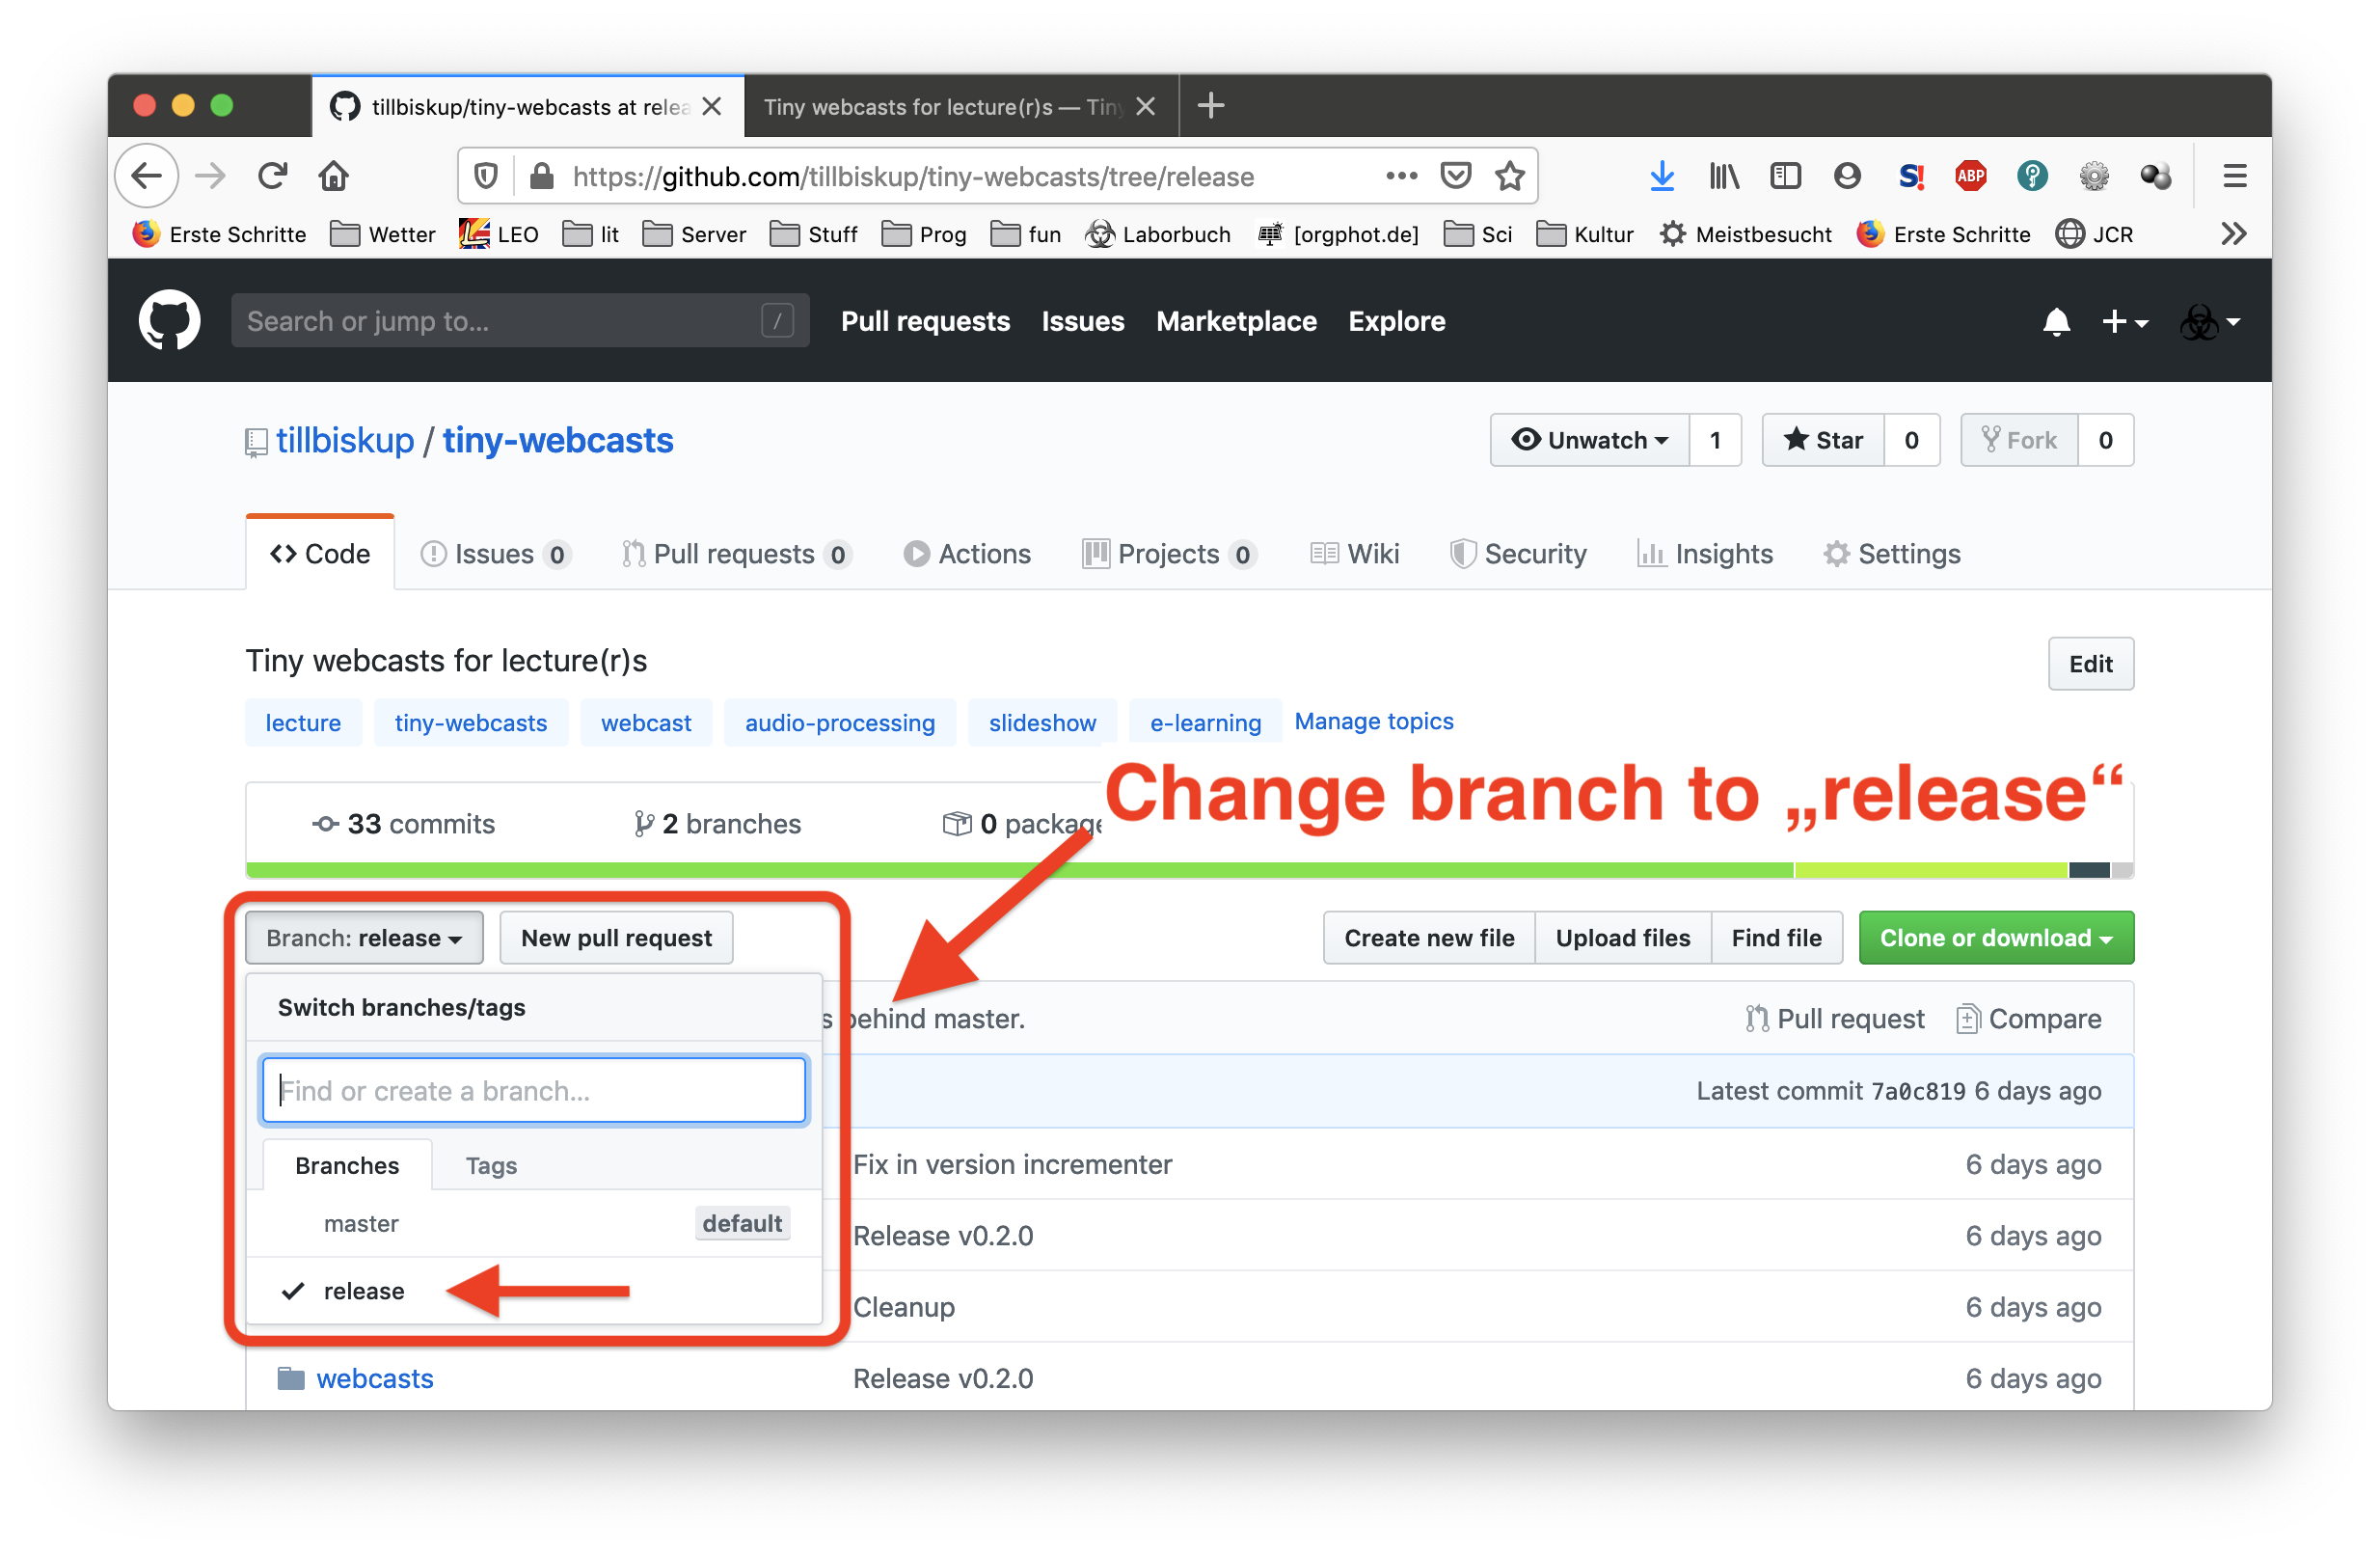
Fig. 2 In a next step, change to the “release” branch, as this will provide you with the latest stable release. Therefore, click on the button on the left labelled “Branch” and select “release” from the list, as shown.
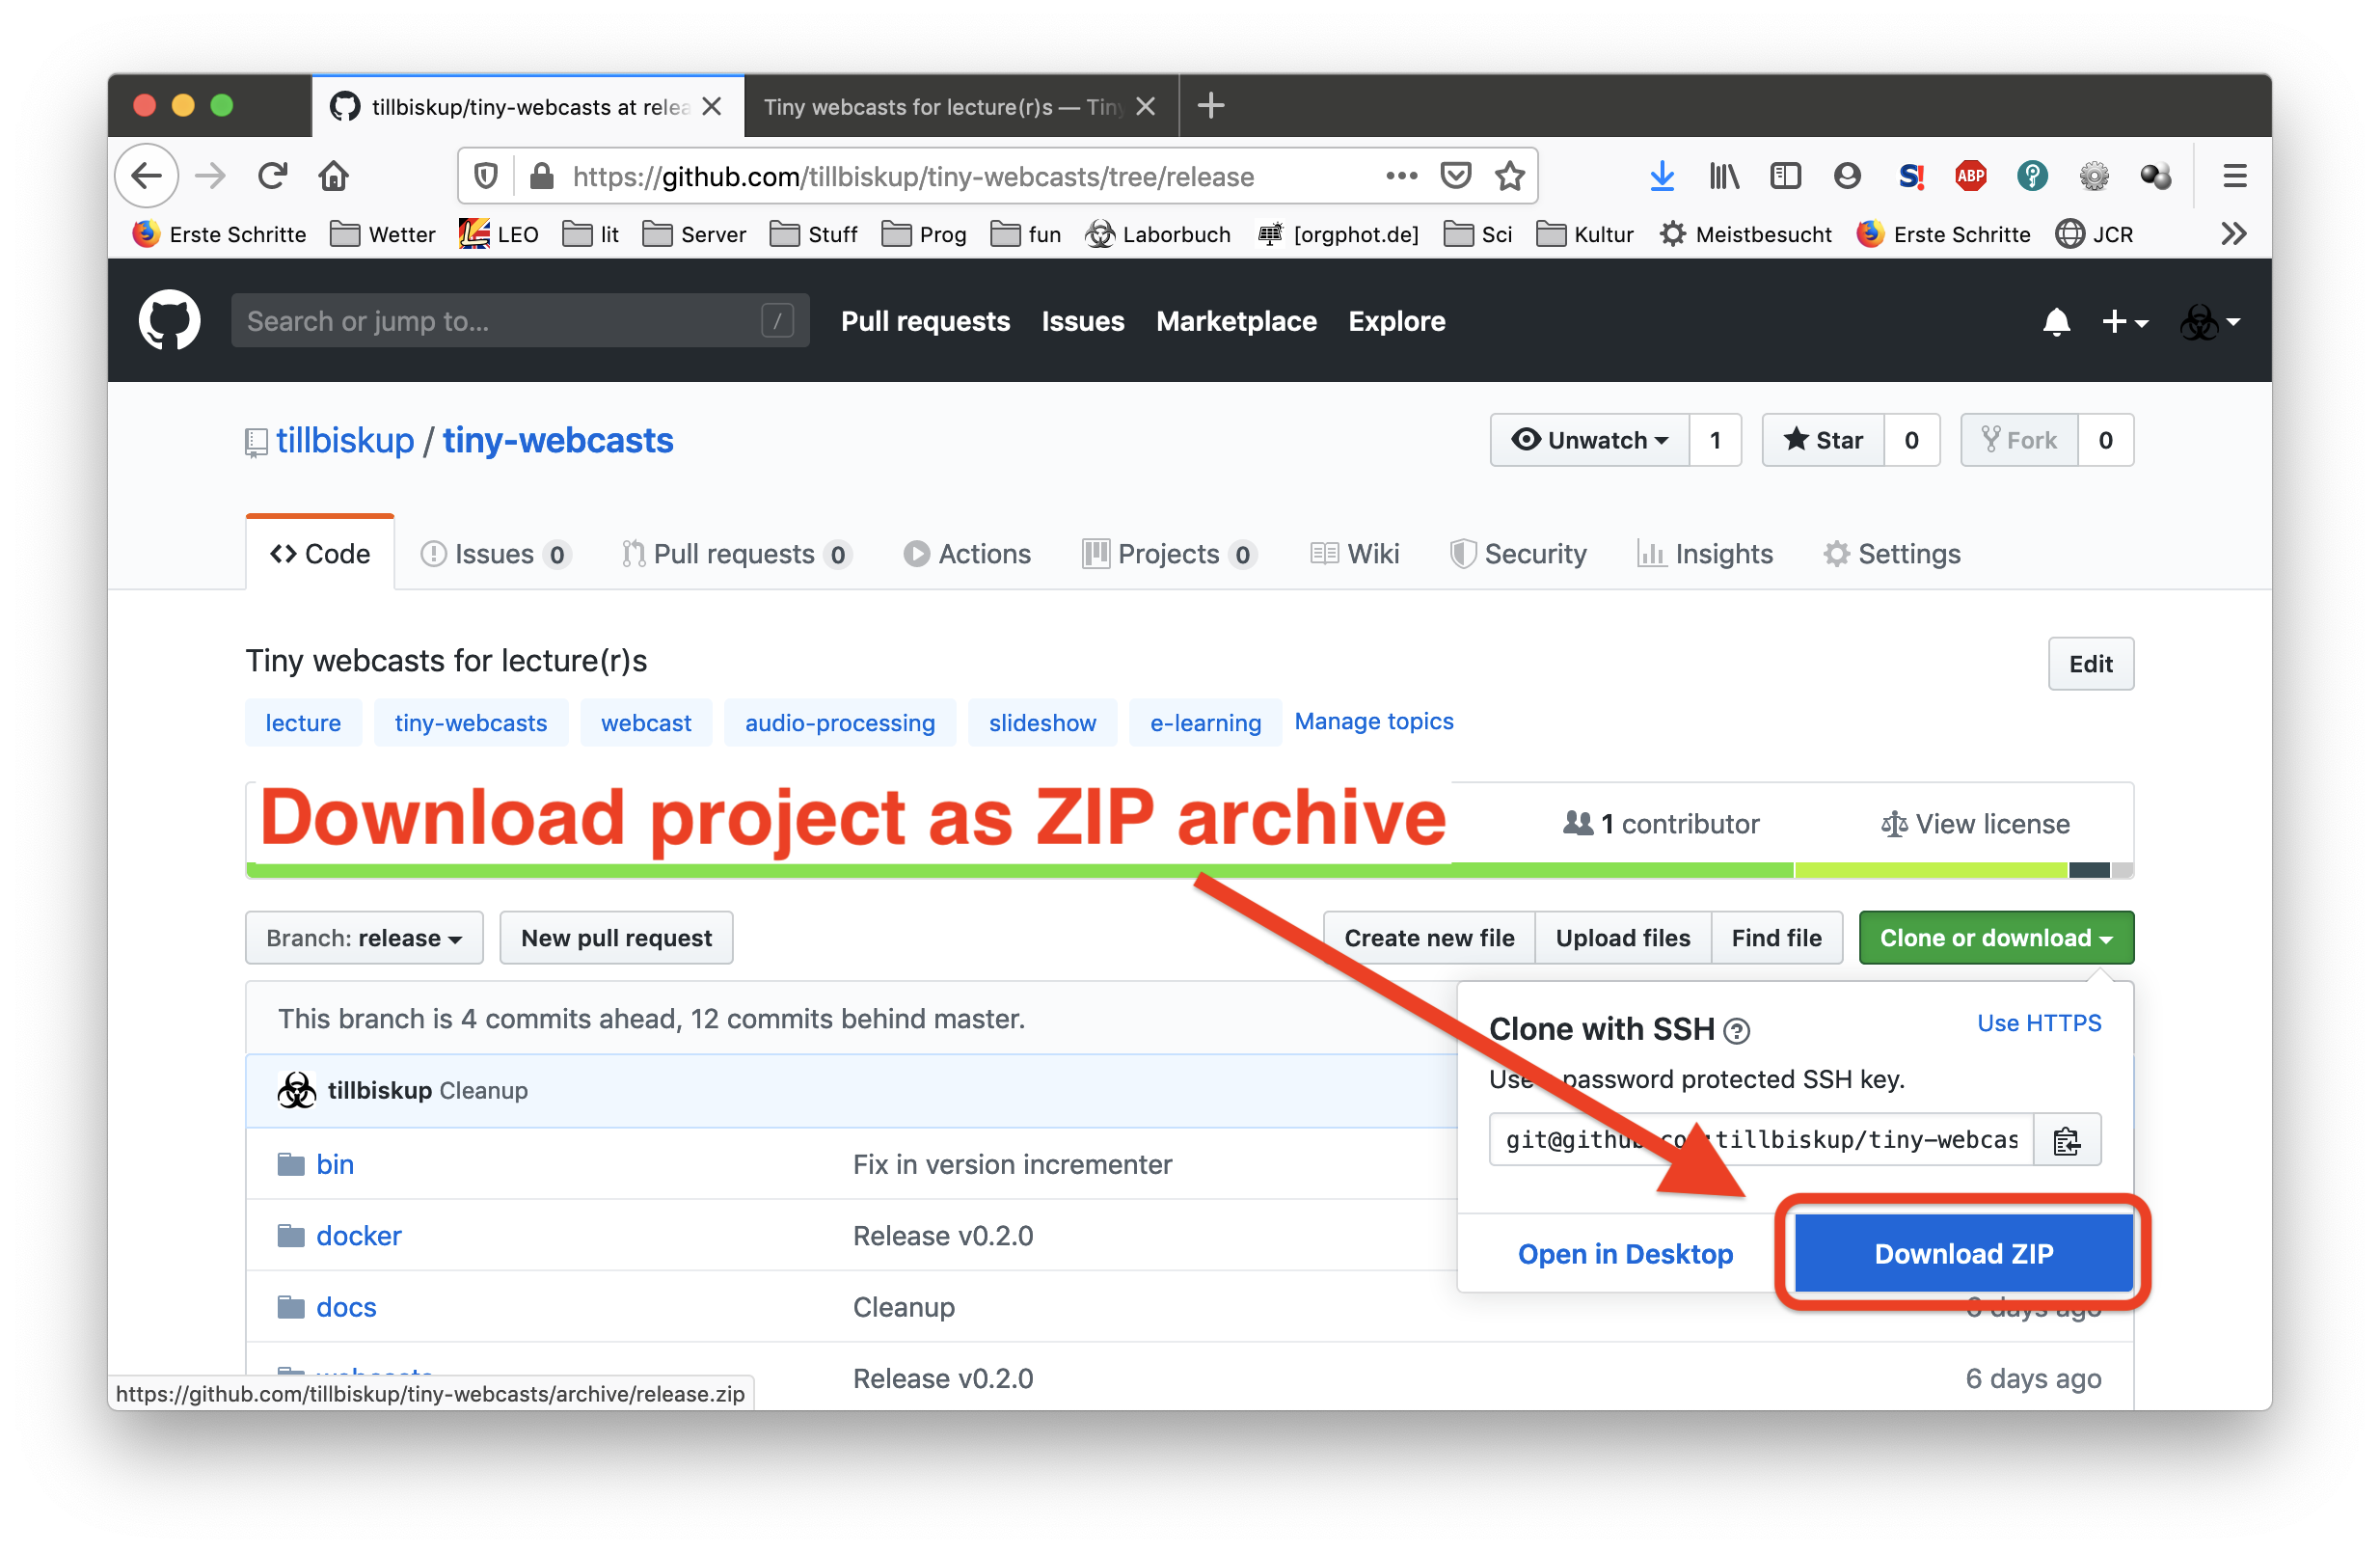
Fig. 3 Finally, download the ZIP archive by pressing the green button “Clone or download” on the right and clicking “Download ZIP” afterwards. Next, a dialogue will pop up asking you how to proceed. Select “Open with Windows Explorer” and proceed as normal for a ZIP archive.
Run the installer
Tiny Webcasts comes with an installer that helps you getting everything setup. It is named twc-docker-install-windows.bat and lives inside the webcasts directory of the directory you’ve just downloaded and unpacked Tiny Webcasts to.
The easiest way of running the installer is to locate it in your file browser (Windows Explorer) and double-click on it.
The installer will do two things for you:
Build the docker image
Install a small batch file named
twc.batto yourWINDOWSdirectory
For the latter, it requires and asks for administrator rights.
Afterwards, Tiny Webcasts should be installed on your computer and you should be able to open a terminal and simply type twc into it.
Congratulations! Now you’re ready to create your first webcast.