Audacity - a short introduction
The following introduction is by no means comprehensive and only scratches the surface of Audacity. The only aim is to get a novice user started quickly with recording audio for webcasts.
Details how to install Audacity for different platforms and how to make it work with the newest versions of macOS can be found on the requirements page.
An overview
Audacity is a very powerful, yet usable program for recording all kinds of audio. Using it as here for recording a single trace of mono and cut this recording afterwards is barely scratching at the possibilities this software offers you.
Fig. 11 shows the audacity window right after you’ve started the program. At the top you find to the left the main controls for recording and playback, and to the right a monitor for the audio level. The main part of the window is reserved for the audio traces, and at the bottom, you have controls that are used later for cutting.
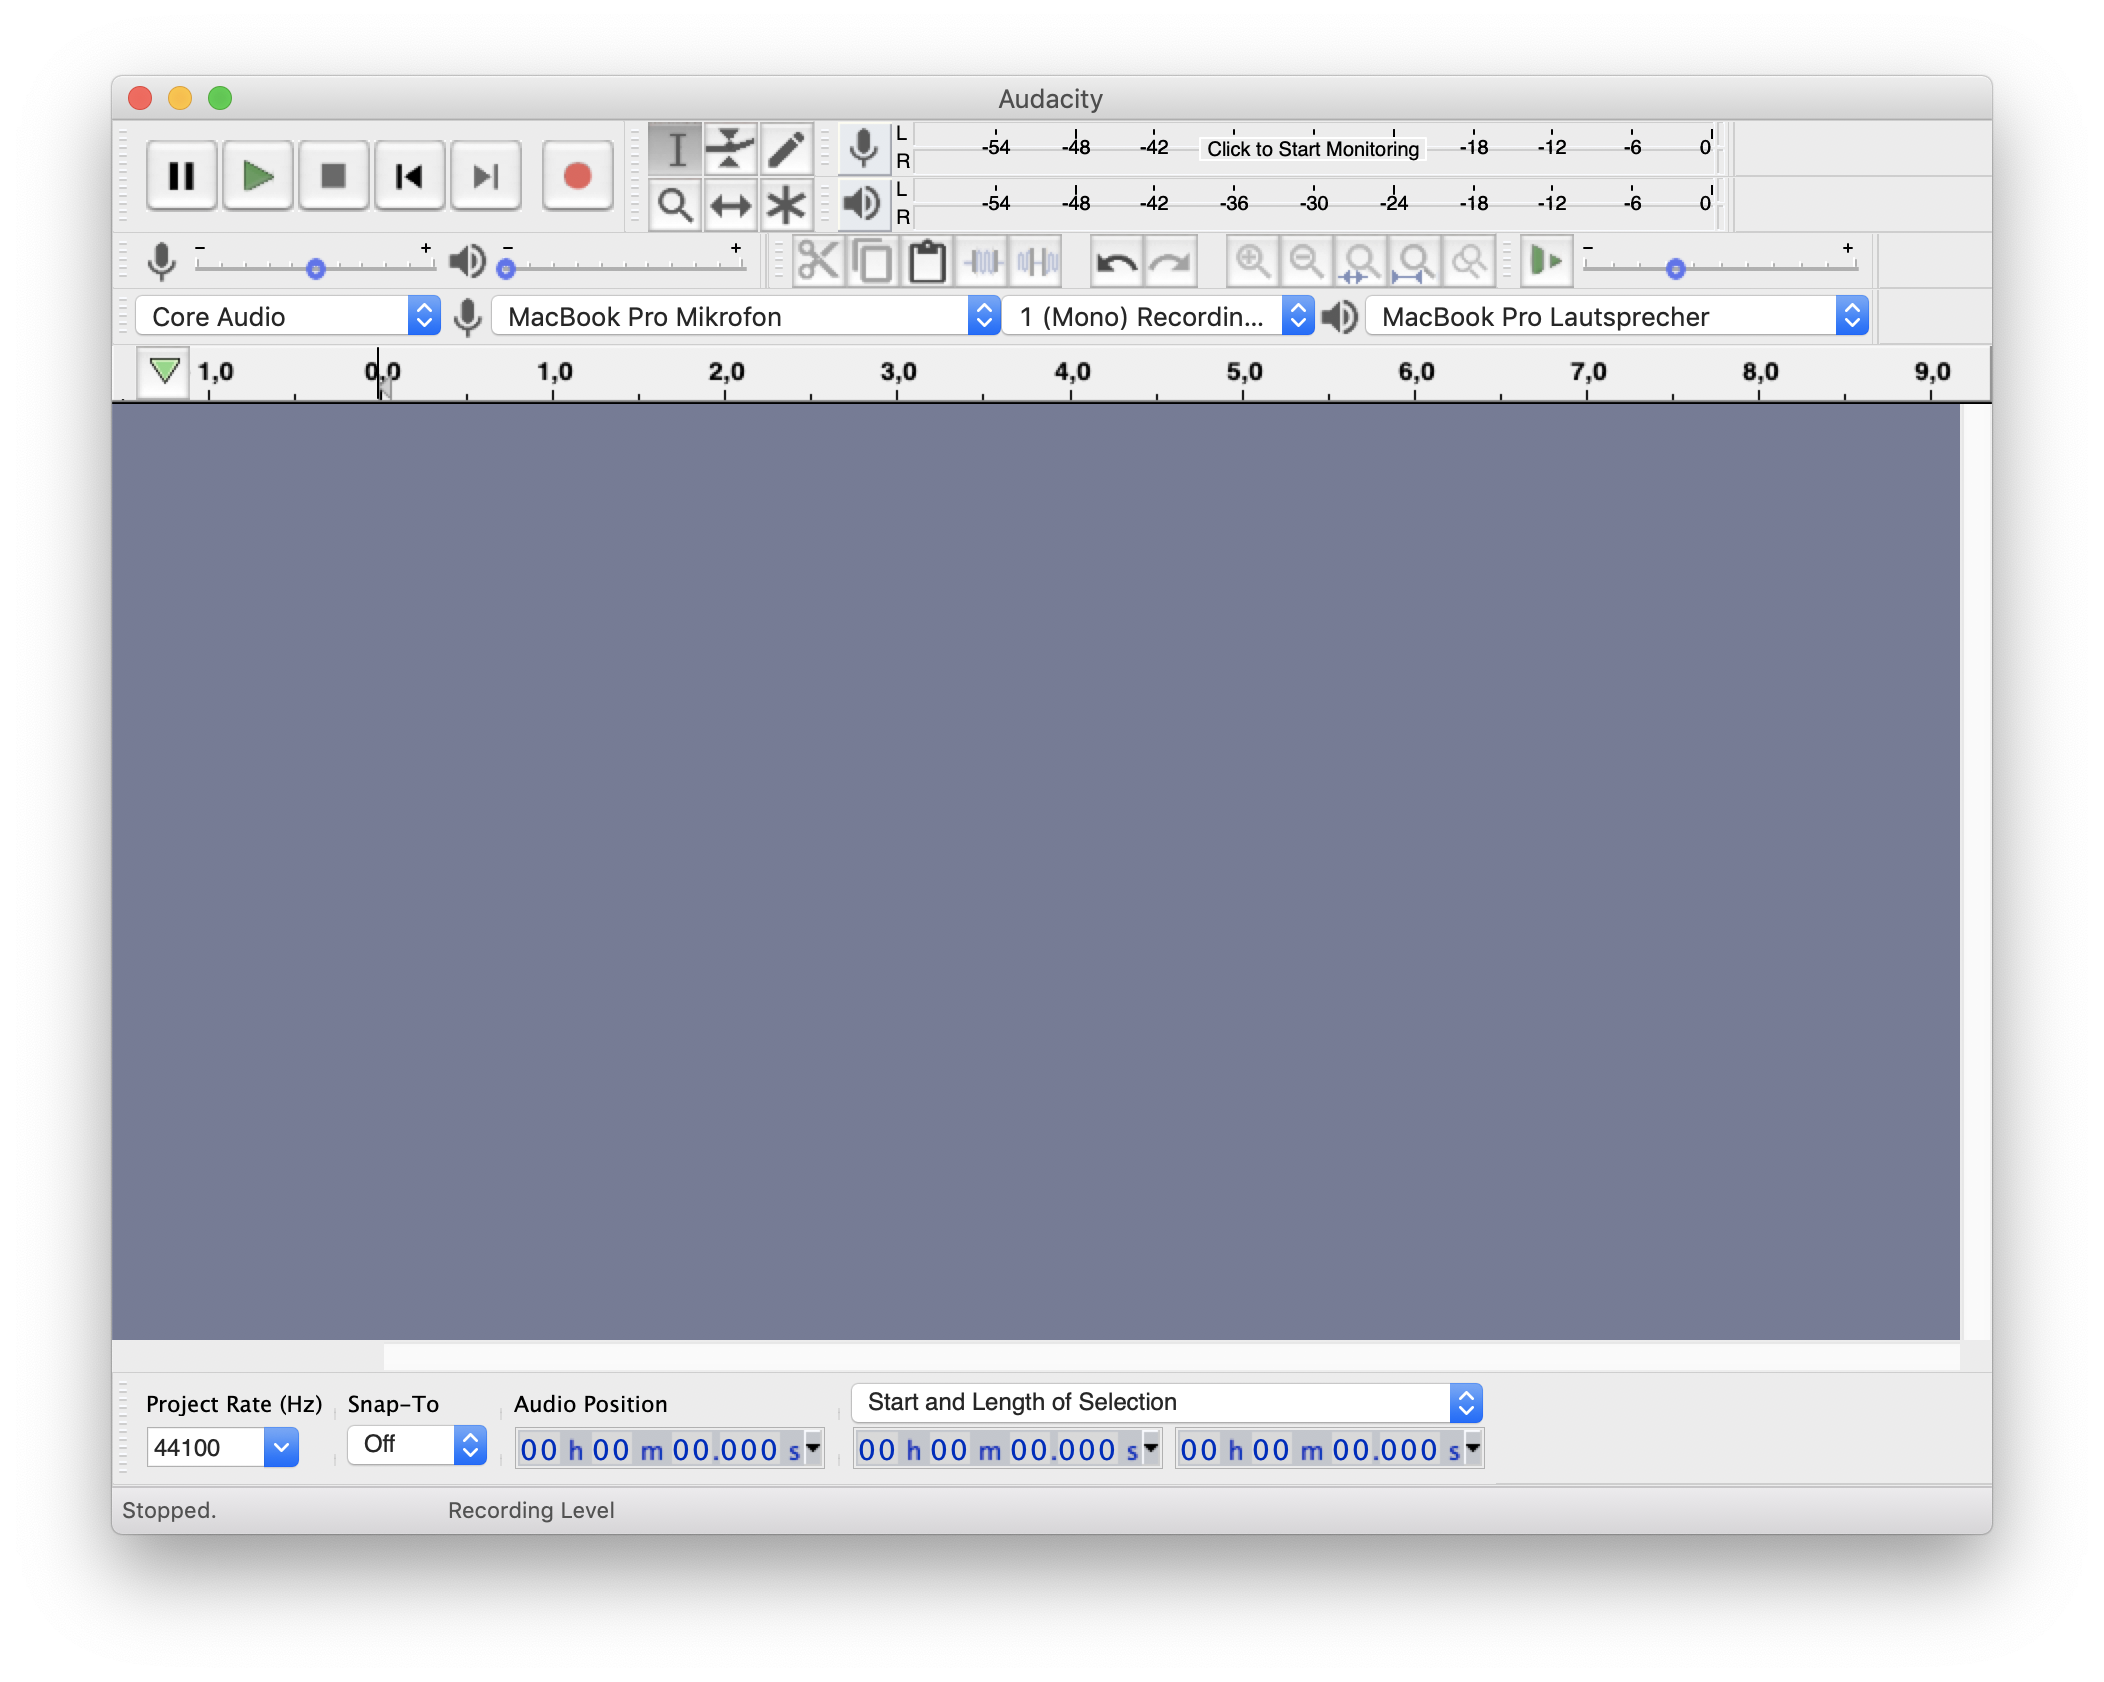
Fig. 11 The Audacity window as it appears after you just started the program. On the top left, you see the controls for recording and playback, to the right there is a monitor for the audio level. The main empty part is reserved for the audio traces, and on the bottom, you find controls for manipulating the audio traces.
As you can see, the screenshot is from a MacBook, and Audacity already detected the standard input and output sources, including mono recording from the builtin microphone. These settings will of course depend on your specific hardware, but should generally be similar. For webcasts, always use mono recording, as there is no need for stereo recording of a single speaker and it only enlarges the file size of the resulting webcast.
If you had a careful look at Fig. 11, you’ve noticed the statement “Click to Start Monitoring” on the top left. If you do so, Audacity will start monitoring the level of your input source, in our case the builtin microphone, cf. Fig. 12. This can be quite useful to see whether it is set too loud. You can adjust the “recording volume” with the slider at the left, just below the main control buttons.

Fig. 12 The audacity window showing the “recording volume”, i.e. the level of your input device, in this case the builtin microphone. To adjust the recording volume, use the slider on the left. Make sure to not pass -3 dB on the monitoring scale, otherwise you will risk clipping of your recording.
Now, having familiarised ourselves with the general layout of the Audacity main window, we can start recording.
Start recording
To start recording, you have generally two choices: Use your mouse and press the record button (the one with the red circle on it), or use your keyboard and press the r key. Audacity will start recording, and an audio trace (mono) will appear in the main part of the window, cf. Fig. 13.
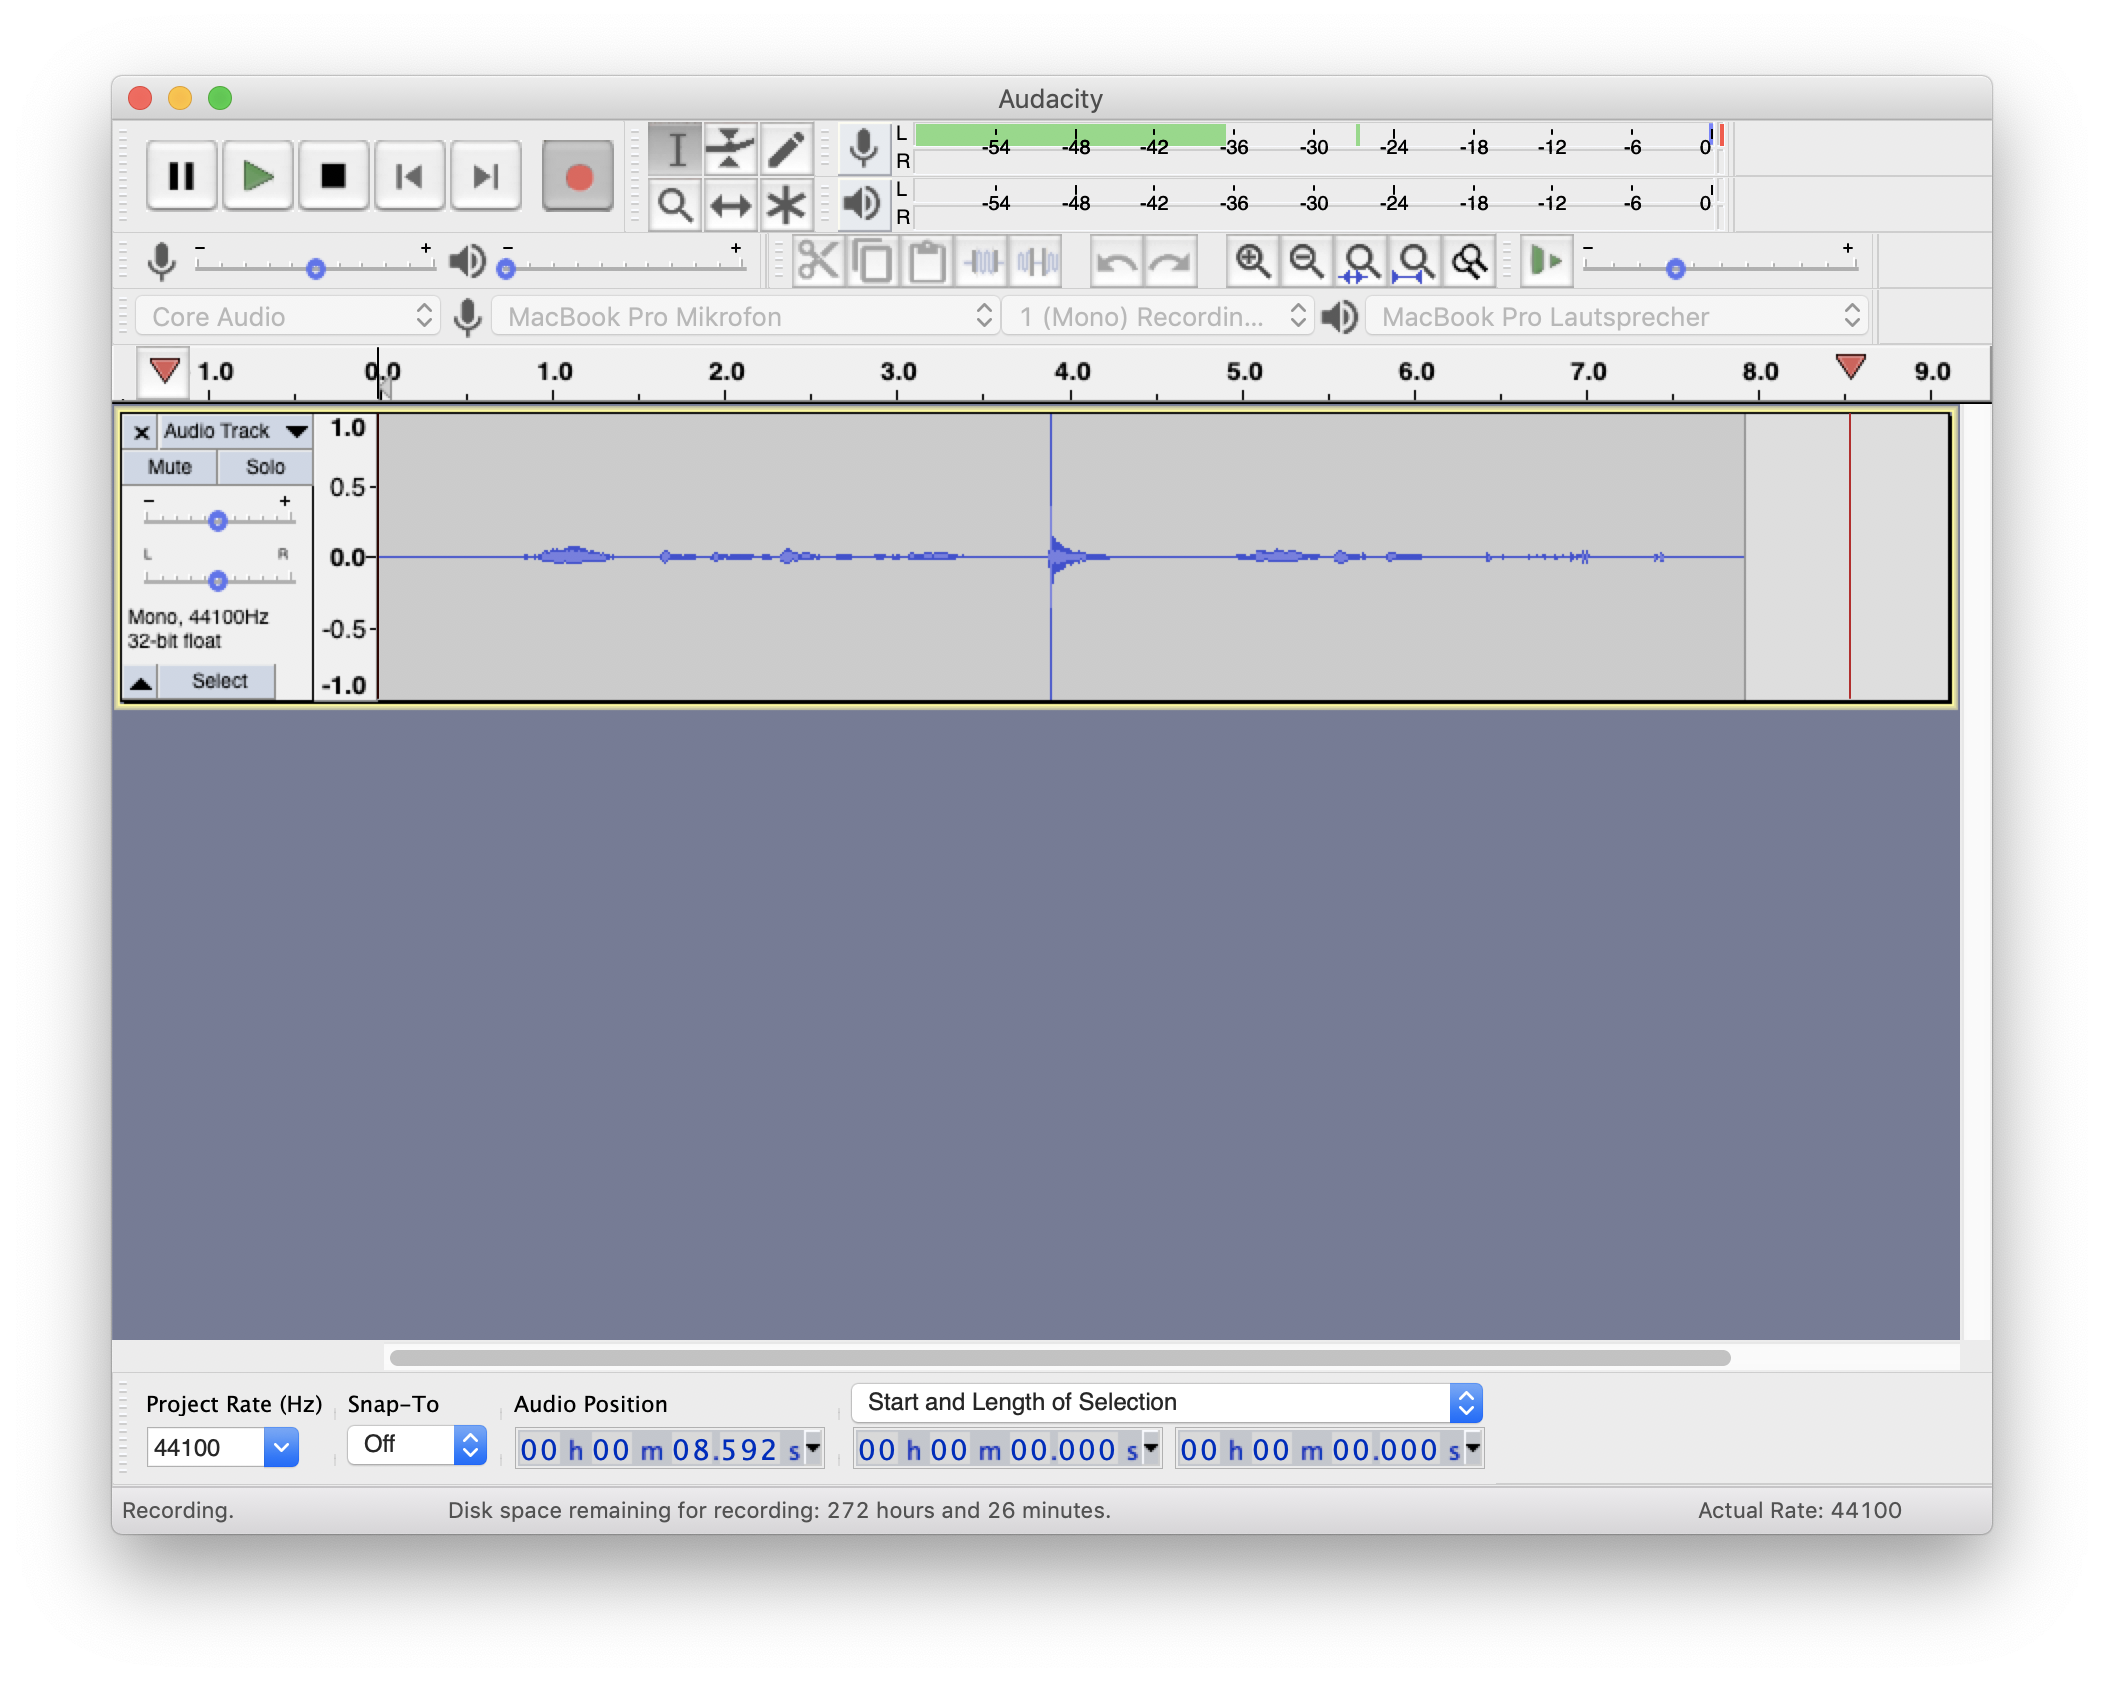
Fig. 13 To start recording, press the r key on your keyboard. To stop recording, press the space key. As soon as you start recording, an audio trace will appear in the Audacity main window, as shown. The signal right in the middle here is from snapping your fingers. As you see, you can clearly distinguish this from the other recording, and hence use it for conveniently cutting your audio trace without need to listen to it entirely.
To stop the current recording, there are again two options: Press the “stop” button (the one with the black square on it) with your mouse, or use your keyboard and hit the space key. Usually, using your keyboard is preferable, as it is much quicker to access.
Export audio
The next step after recording your audio trace is to save it as a WAV file to your hard drive. Note that saving in Audacity is something different from exporting. You can save projects, but if you are – as we currenty – only interested in getting a WAV file of your single trace, use “File” > “Export” > “Export Audio” from the menu. There is usually a keyboard shortcut for it, as shown in the menu next to the “Export Audio” entry. For macOS, it is Shift + Cmd + E.
Next, a window will appear similar to Fig. 14 asking you for a filename. It is safe here to use the default settings, such as “WAV (Microsoft) 16-bit PCM” as a format. Please make sure to have a sensible naming scheme of your files. It is advisable to add the suffix -raw as shown here to the raw recording of your webcast.
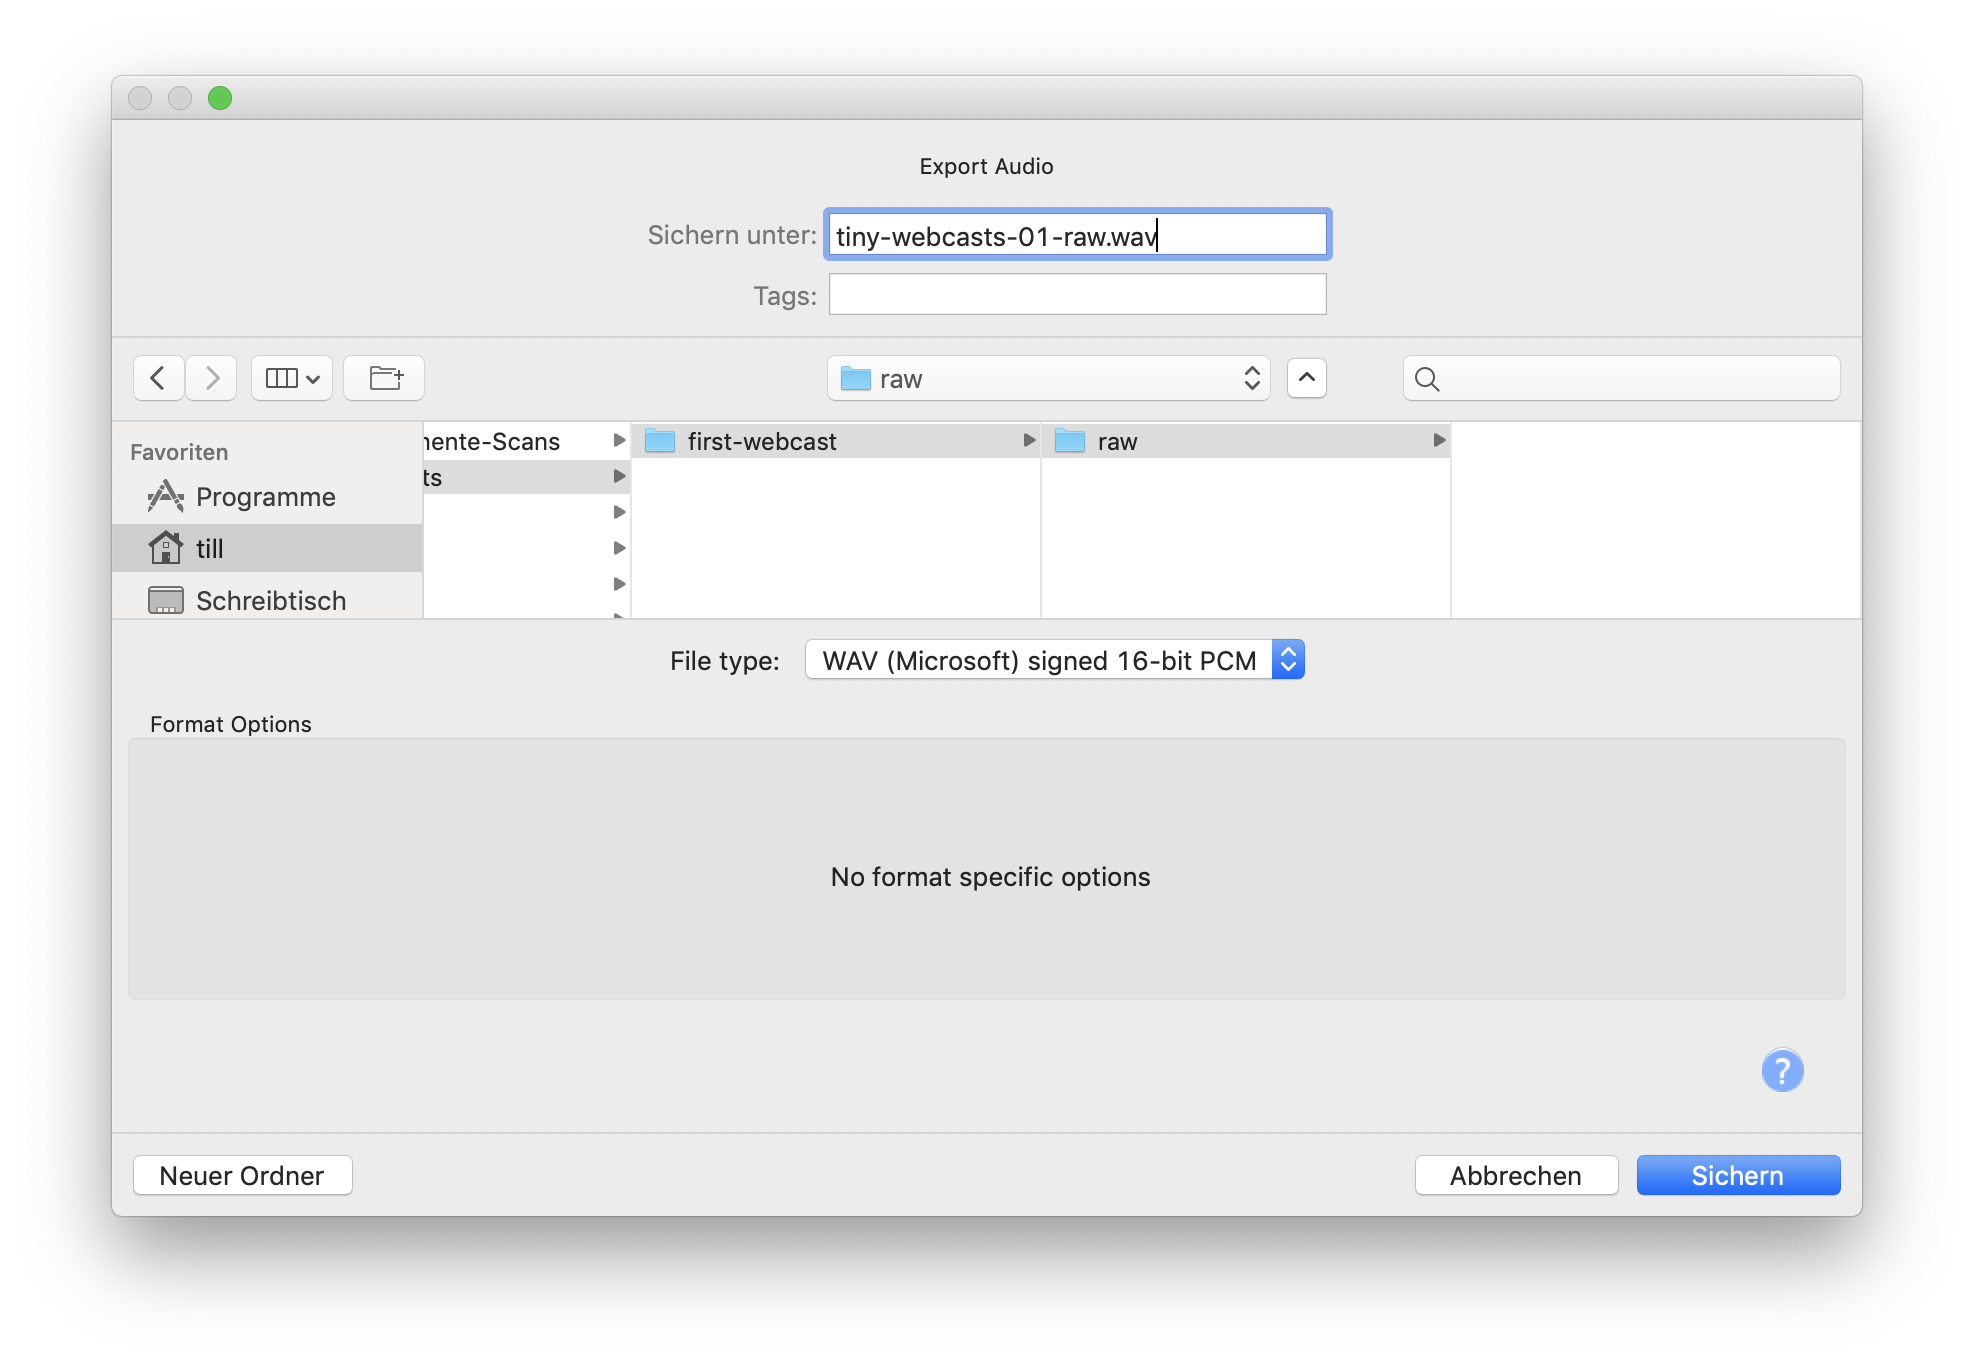
Fig. 14 Exporting audio as WAV file after recording in Audacity. It is safe to use the default settings here. Make sure to follow a sensible filename convention. It is advisable to add the suffix -raw as shown here to the raw recording of your webcast.
Next, you will be presented with an additional window to add your metadata, cf. Fig. 15. While generally a very good idea, you may skip this step in this case, as we will not use the metadata you enter here later on. However, these metadata will most probably be used by your operating system and help you find the recording again if you search for it.
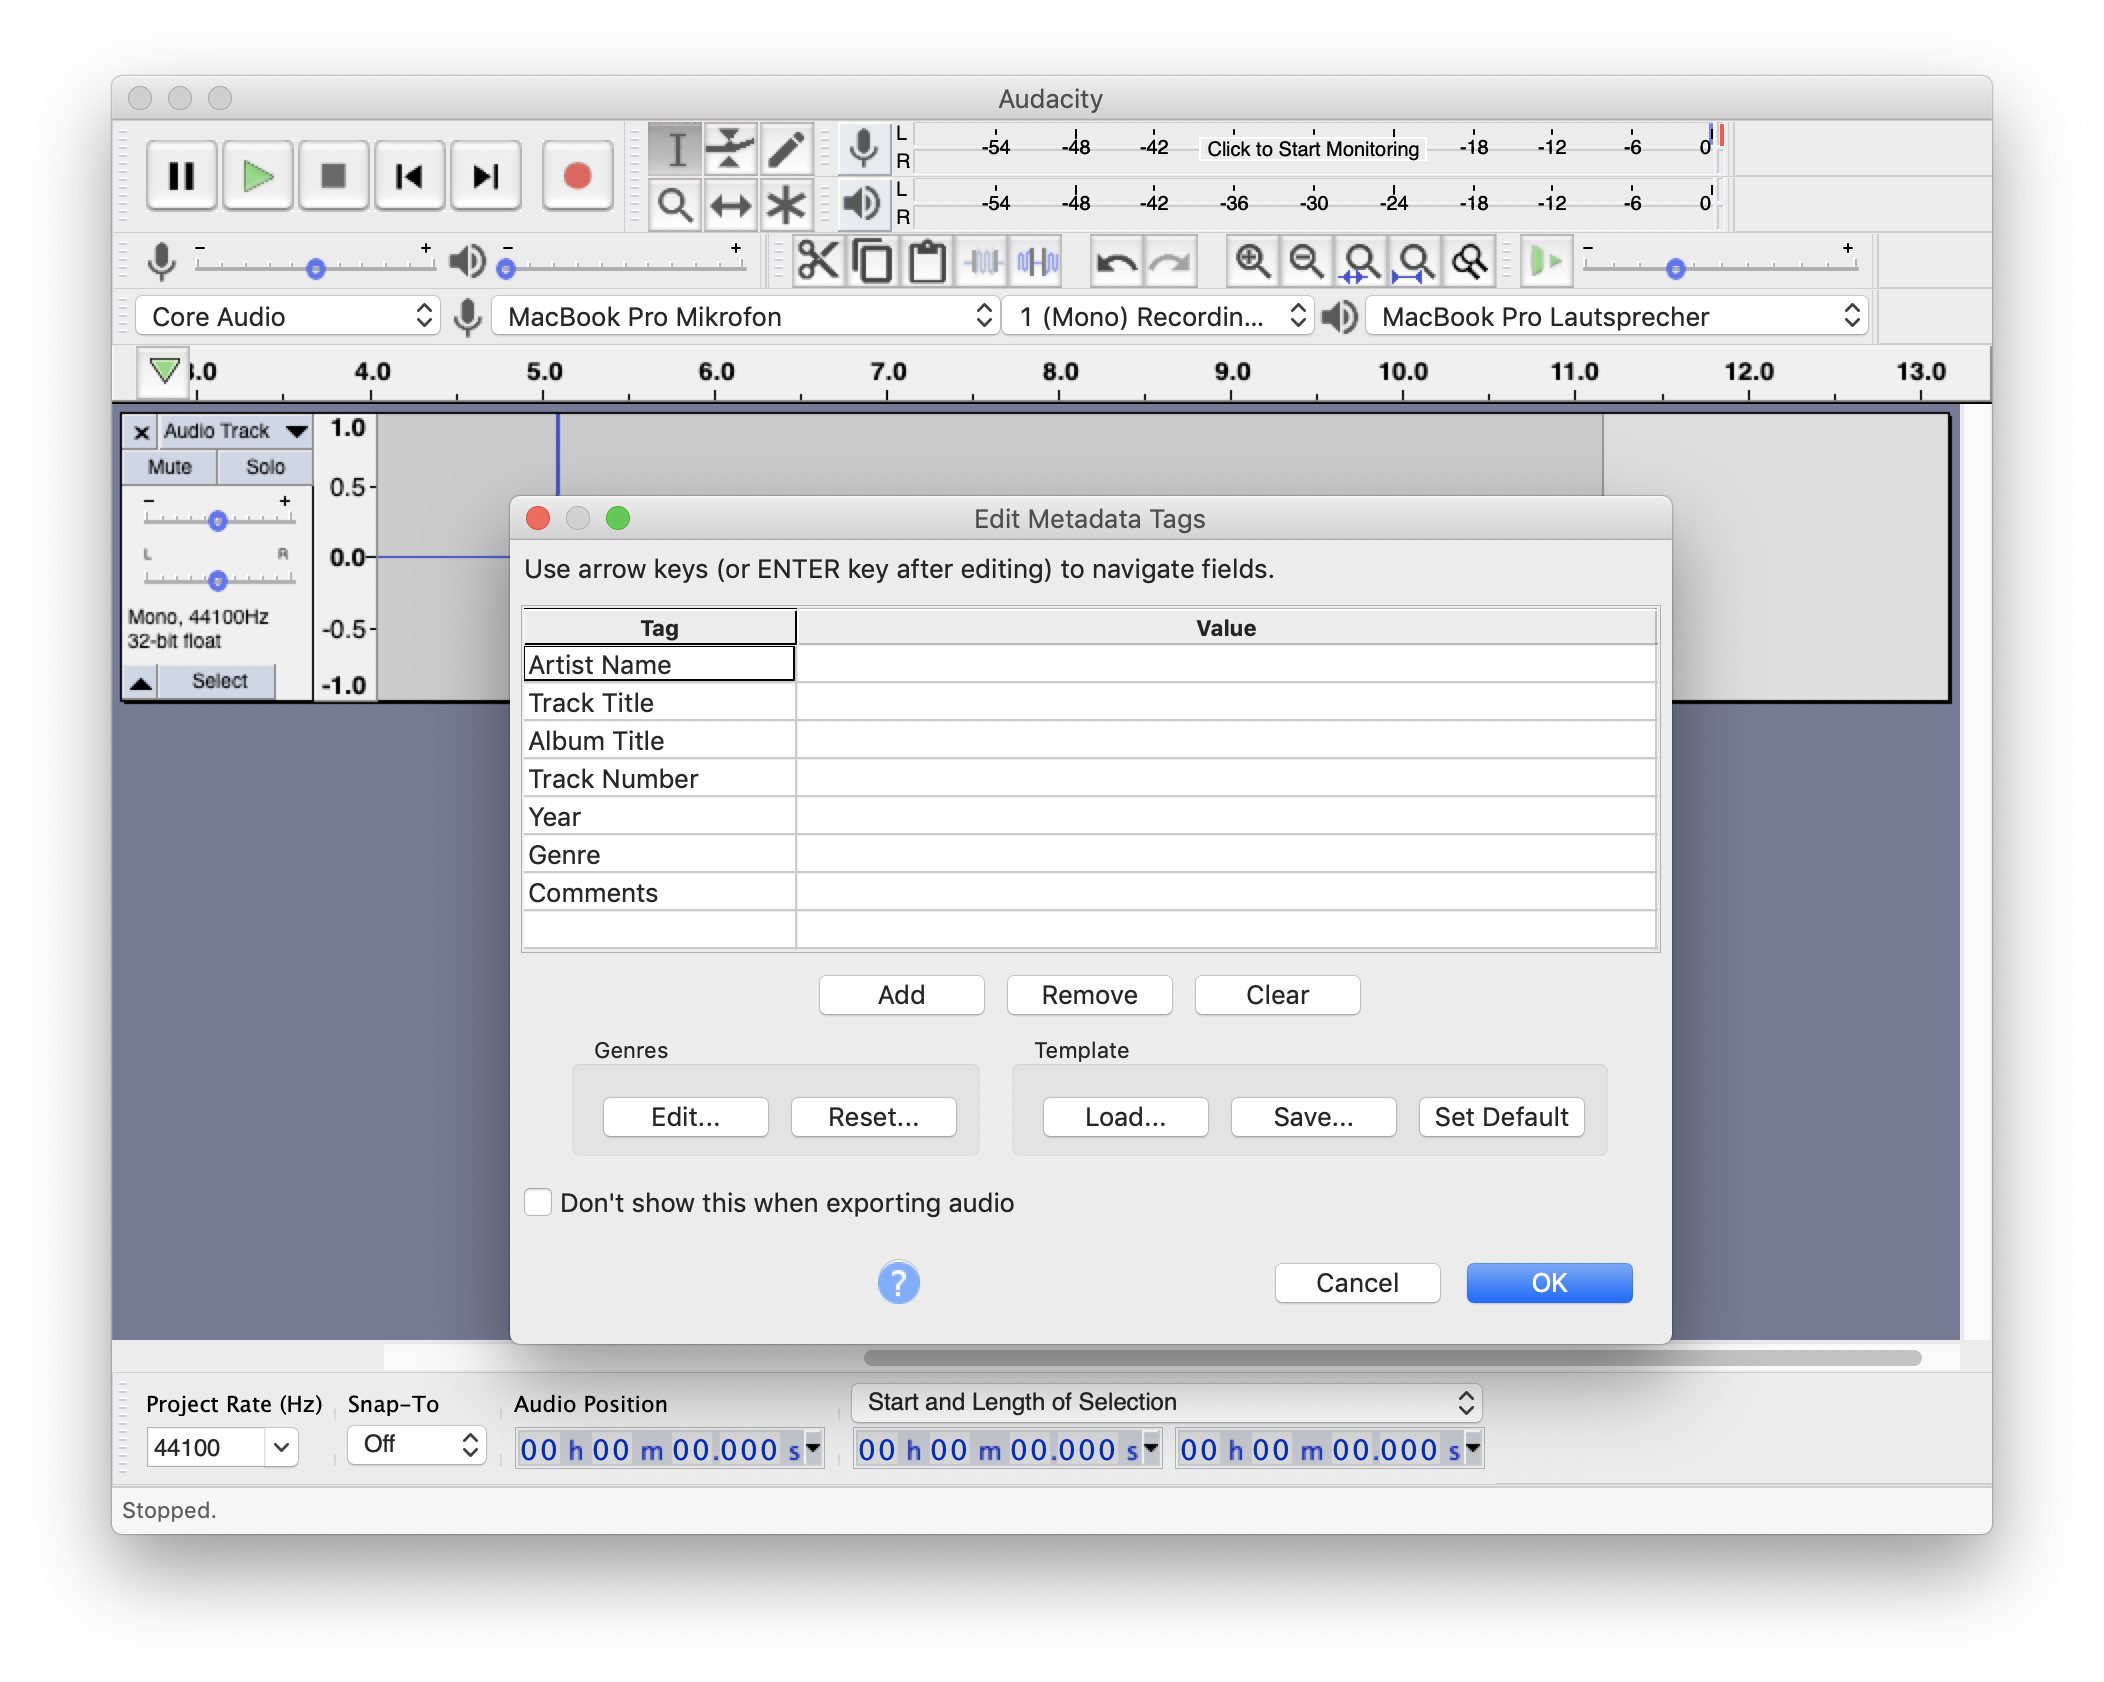
Fig. 15 Edit metadata tags for audio file to be exported. While generally very useful, you may skip this step here, as we will use other means to add metadata to the final webcast.
After we have now saved our audio trace, we can actually start cutting the trace in single pieces, one for each slide.
Cut audio
For the webcasts, two things are important to have in mind when recording and cutting the audio:
Each piece of audio should have a length that is a multiple of 0.5 seconds. This is due to the low frame rate of the final webcast saving a lot of file size.
Have cut marks. Snapping your fingers between slides is a great way to mark where to cut during recording. Leave enough time before and after snapping your fingers, in order to easily cut the audio to a length that’s a multiple of 0.5 seconds.
There is clearly different ways how to cut your recorded audio. The way proposed here is to mark the sections for each of the slides, ensure that the marked area is a multiple of 0.5 seconds long, and export the selected audio as WAV file.
Important
Please note that the way described here to cut your audio trace does not yet reflect the alternative way of letting Audacity determine the track boundaries. Furthermore, you need not cut the tracks to exact multiples of 0.5 seconds, but should make sure that they are usually slightly longer. The audio files will be adjusted automatically to multiples of 0.5 seconds by cutting from the end.
As mentioned, it comes in quite handy to have cut marks (by snapping your fingers) optically visible on your audio trace, as shown in Fig. 16.
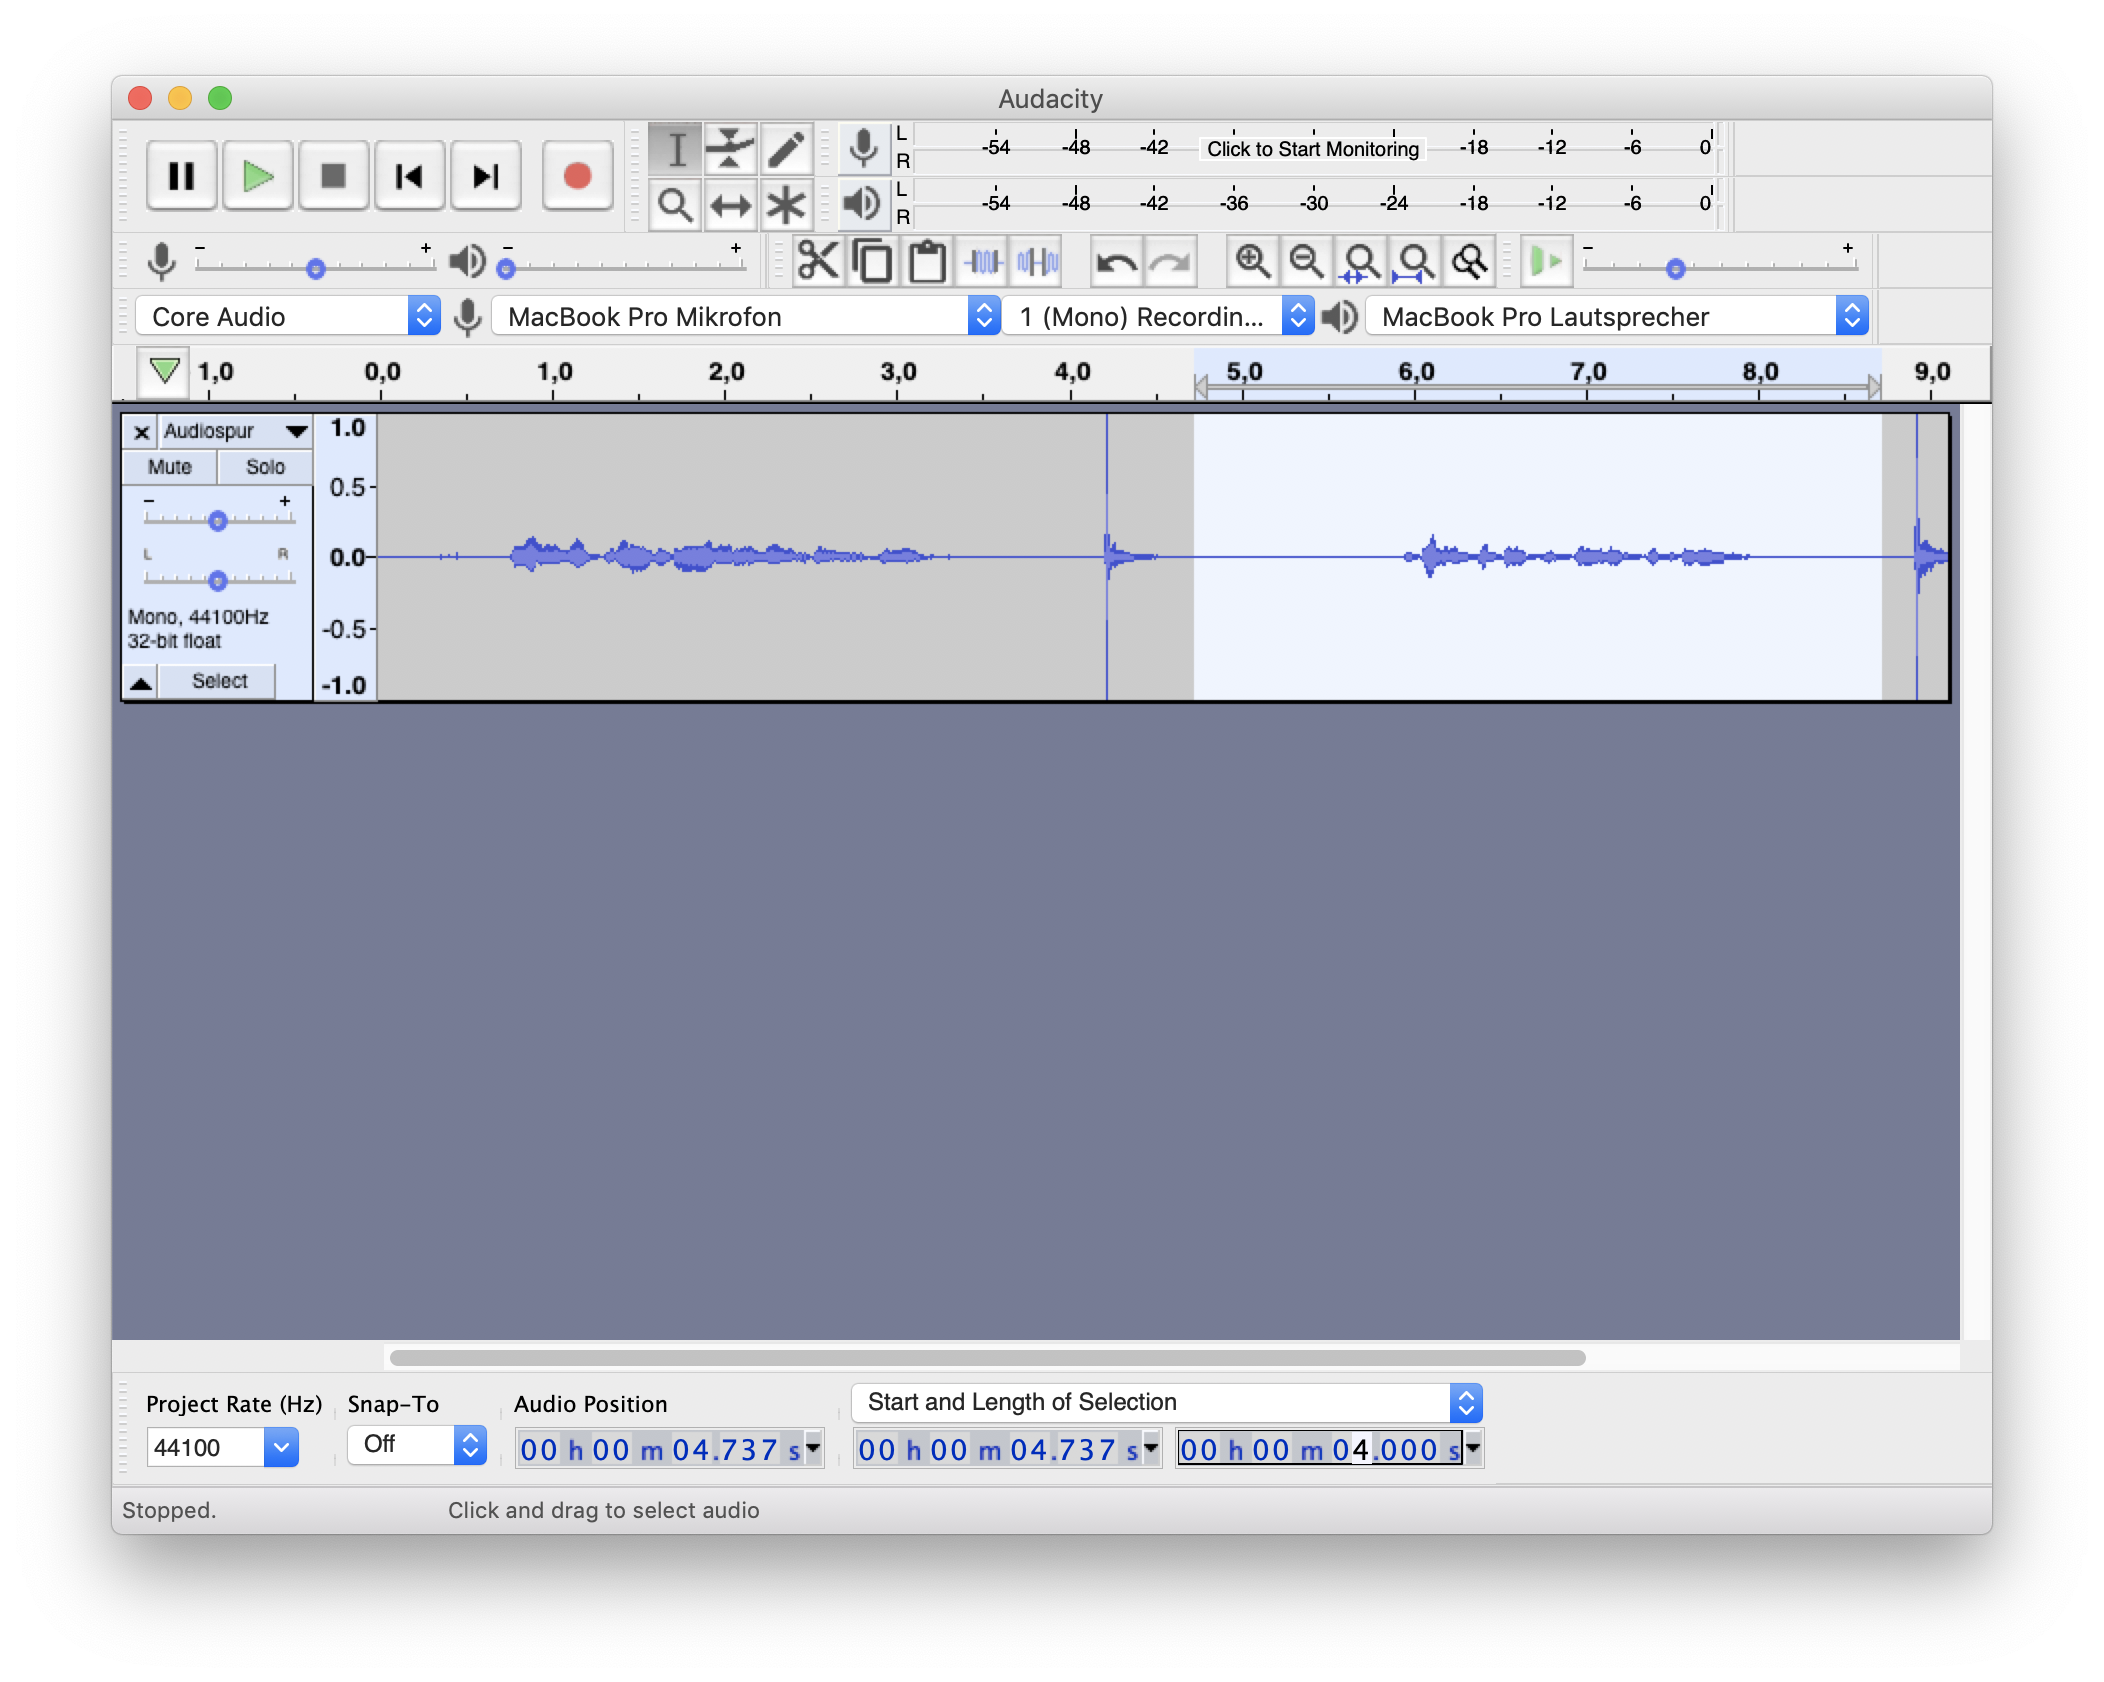
Fig. 16 Cut the audio trace by selecting parts of it and export the selection. it comes in quite handy to have cut marks (by snapping your fingers) optically visible on your audio trace. Note the controls on the lower part of the window helping with selecting pieces of your audio trace.
Furthermore, now you see the beauty of the controls on the lower part of the Audacity window for selecting your pieces of audio trace. Make sure to have selected “Start and Length of Selection” in order to easily set the length to multiples of 0.5 seconds. You can directly type in numbers here with your keyboard, making it quite simple and fast in routine operation.
Next, select “File” > “Export” > “Export Selected Audio…” to export only the selection (in contrast to the whole trace) as WAV file. Again, a quite familiar window will open, cf. Fig. 17. Make sure once again to have sensible names for your recording. The default, audio-001, is not bad. Make sure to consecutively number your exported files.
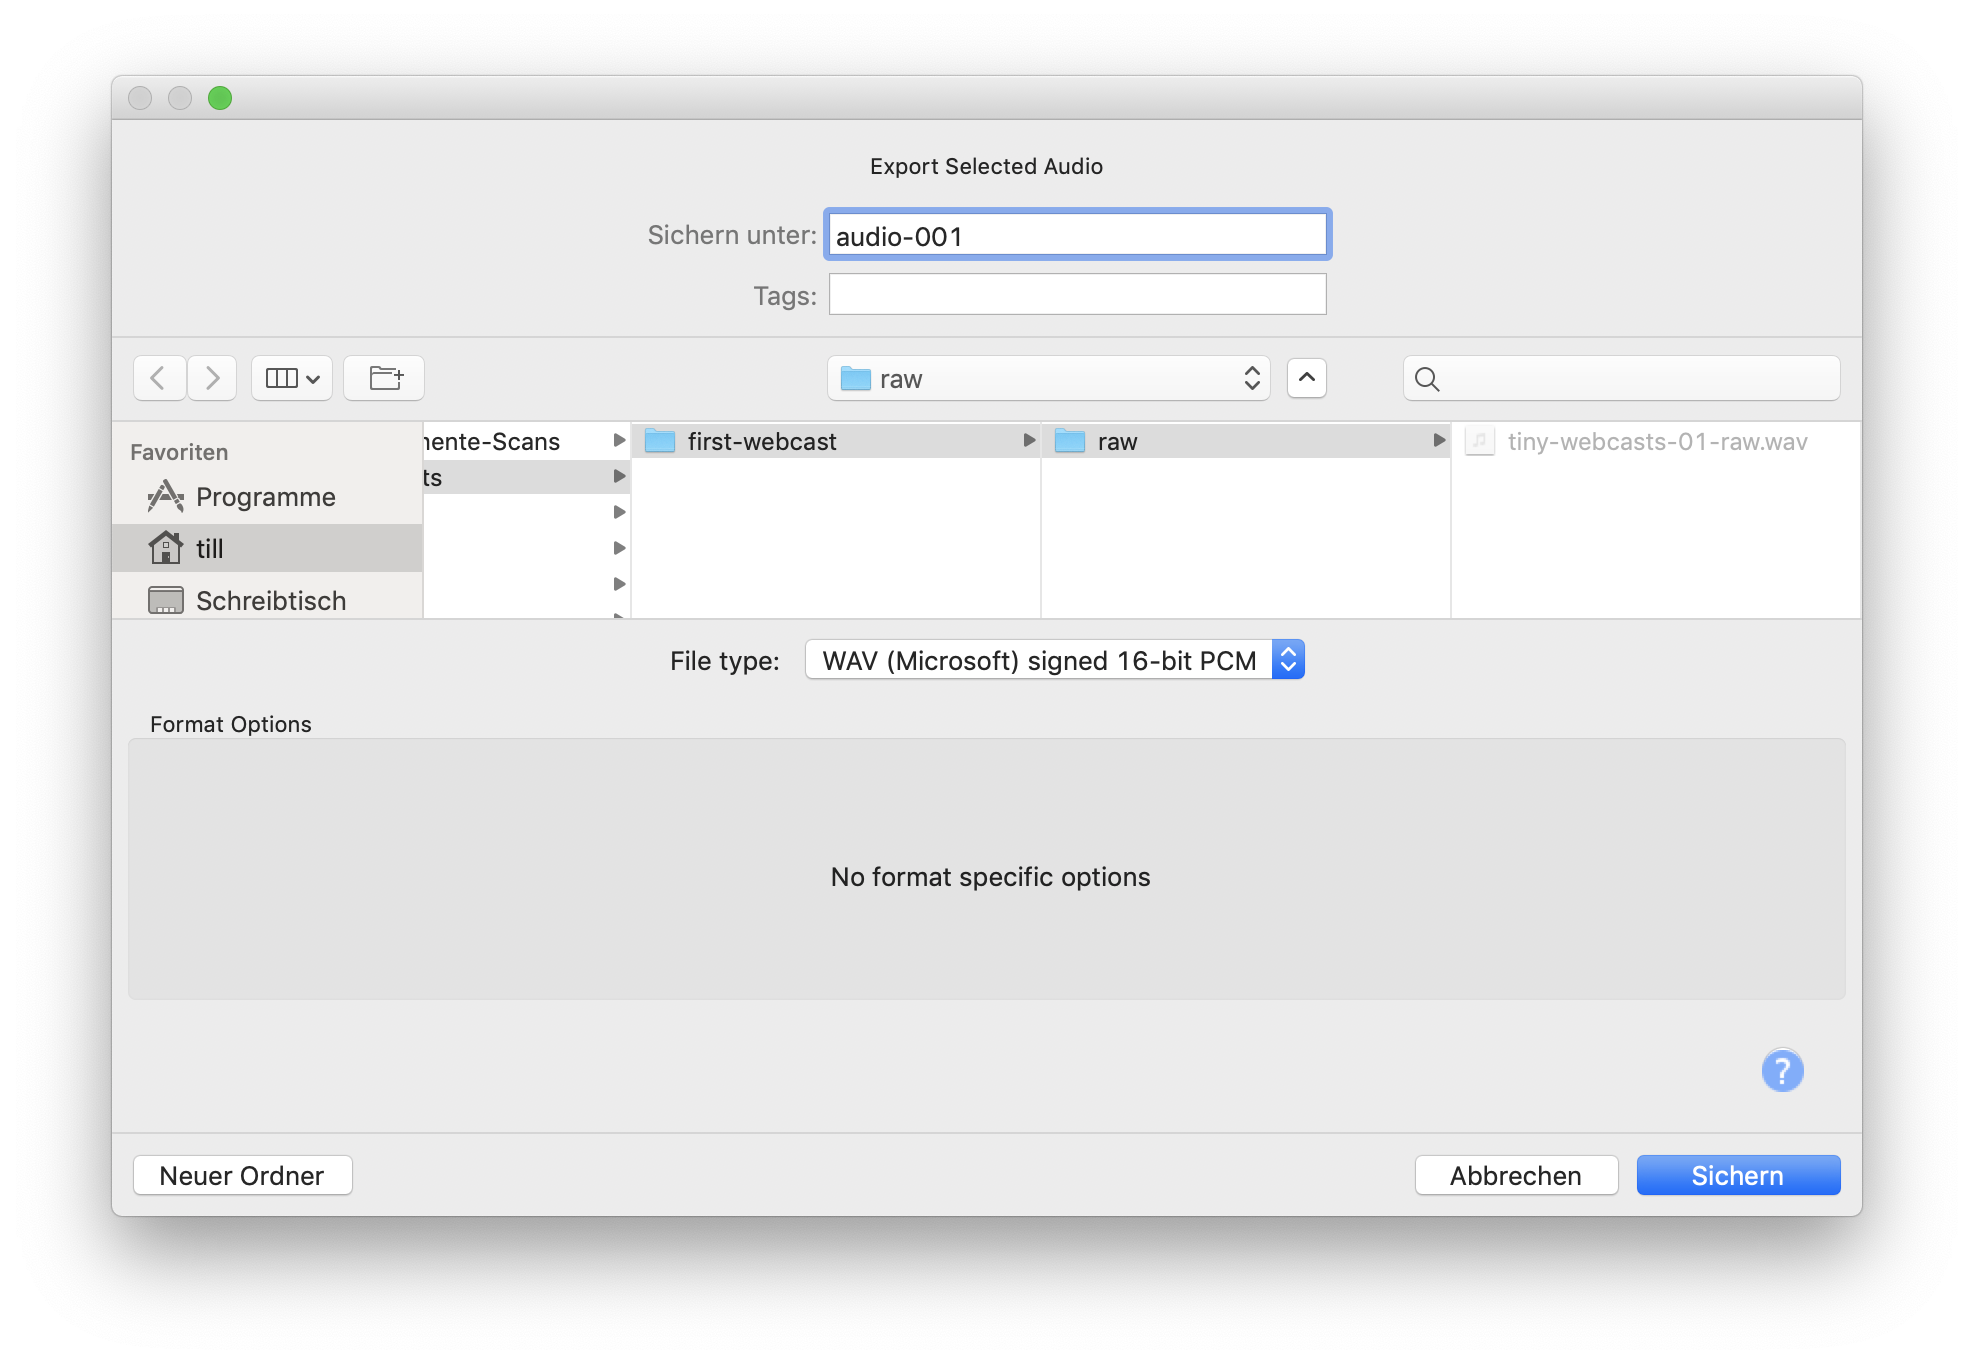
Fig. 17 Exporting selected audio as WAV file after recording in Audacity. It is safe to use the default settings here. Make sure to follow a sensible filename convention. The default, audio-001, is a good choice for your first exported piece of audio. Make sure to consecutively number your exported files.
The next window is familiar as well, cf. Fig. 18. Here, again, you can edit the metadata for the selected audio to be exported. While generally advisable, you may skip this step here, as we will use other means to write the metadata to the final webcast.
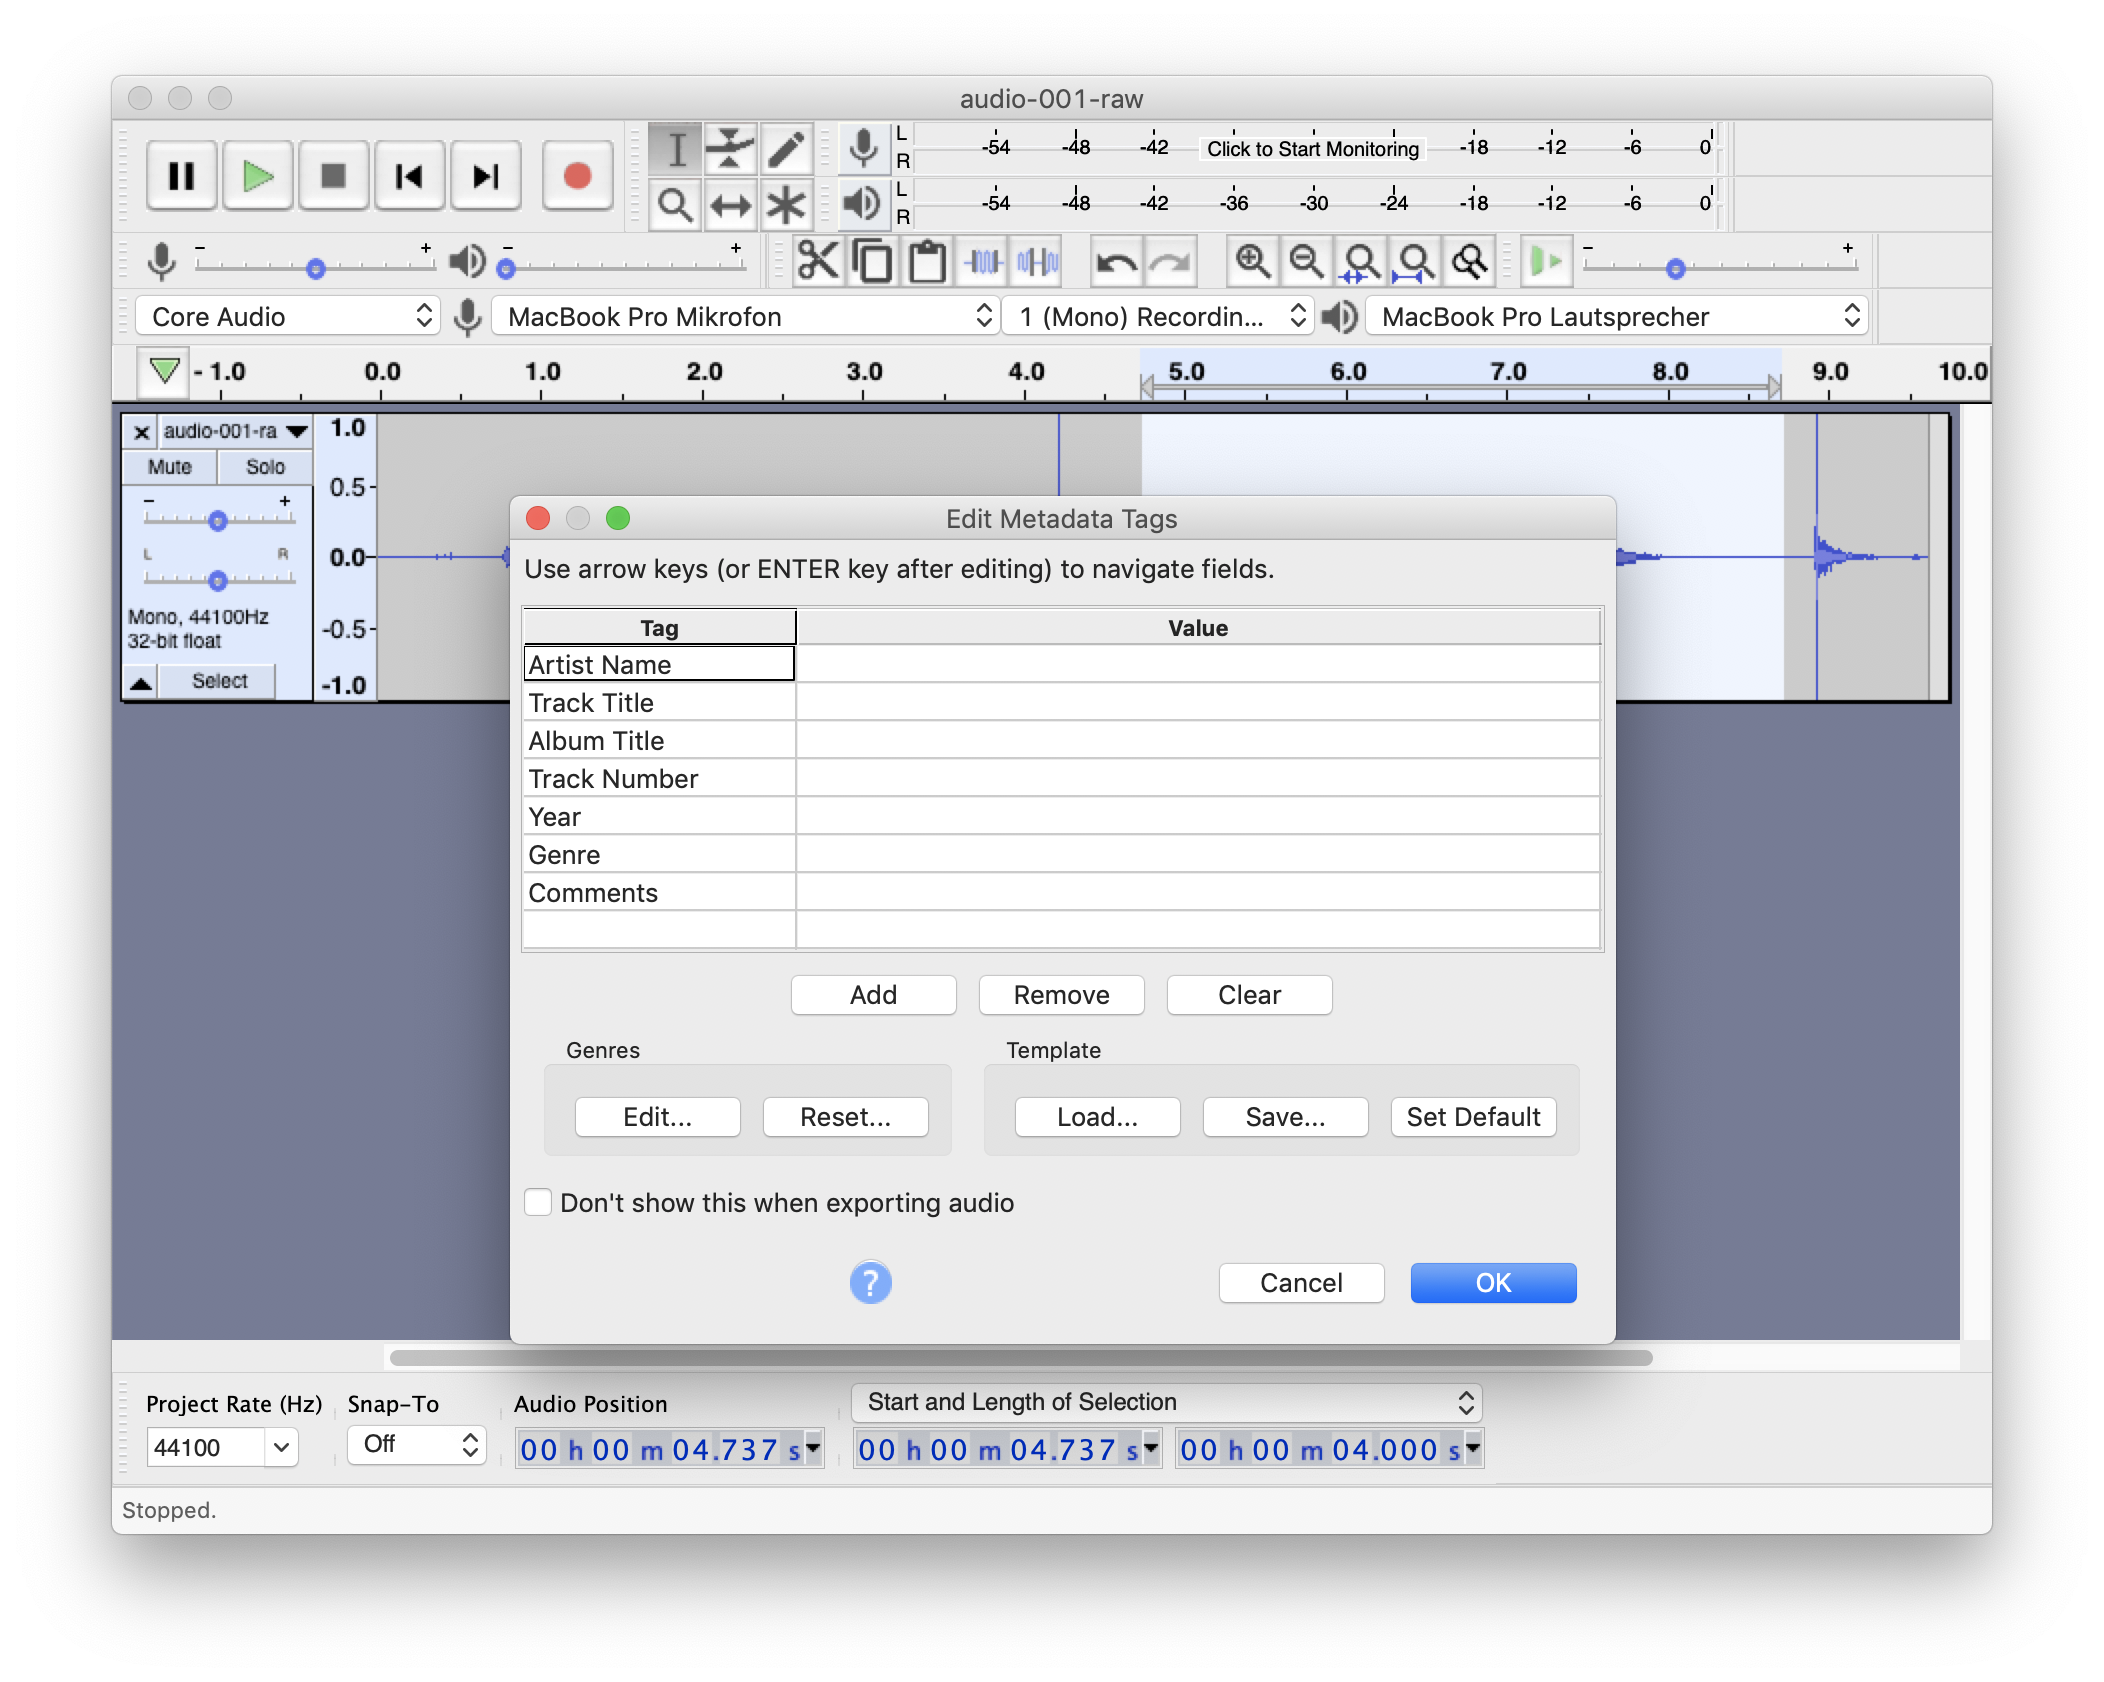
Fig. 18 Edit metadata tags for audio file to be exported. While generally very useful, you may skip this step here, as we will use other means to add metadata to the final webcast.
You may have noticed that there is no default keyboard shortcut for exporting the current selection of your audio trace. This can be changed easily in the preferences of audacity, and it comes in quite handy in our situation. To add a keyboard shortcut, open the Audacity preferences window and switch to the “Keyboard” section, shown in Fig. 19.
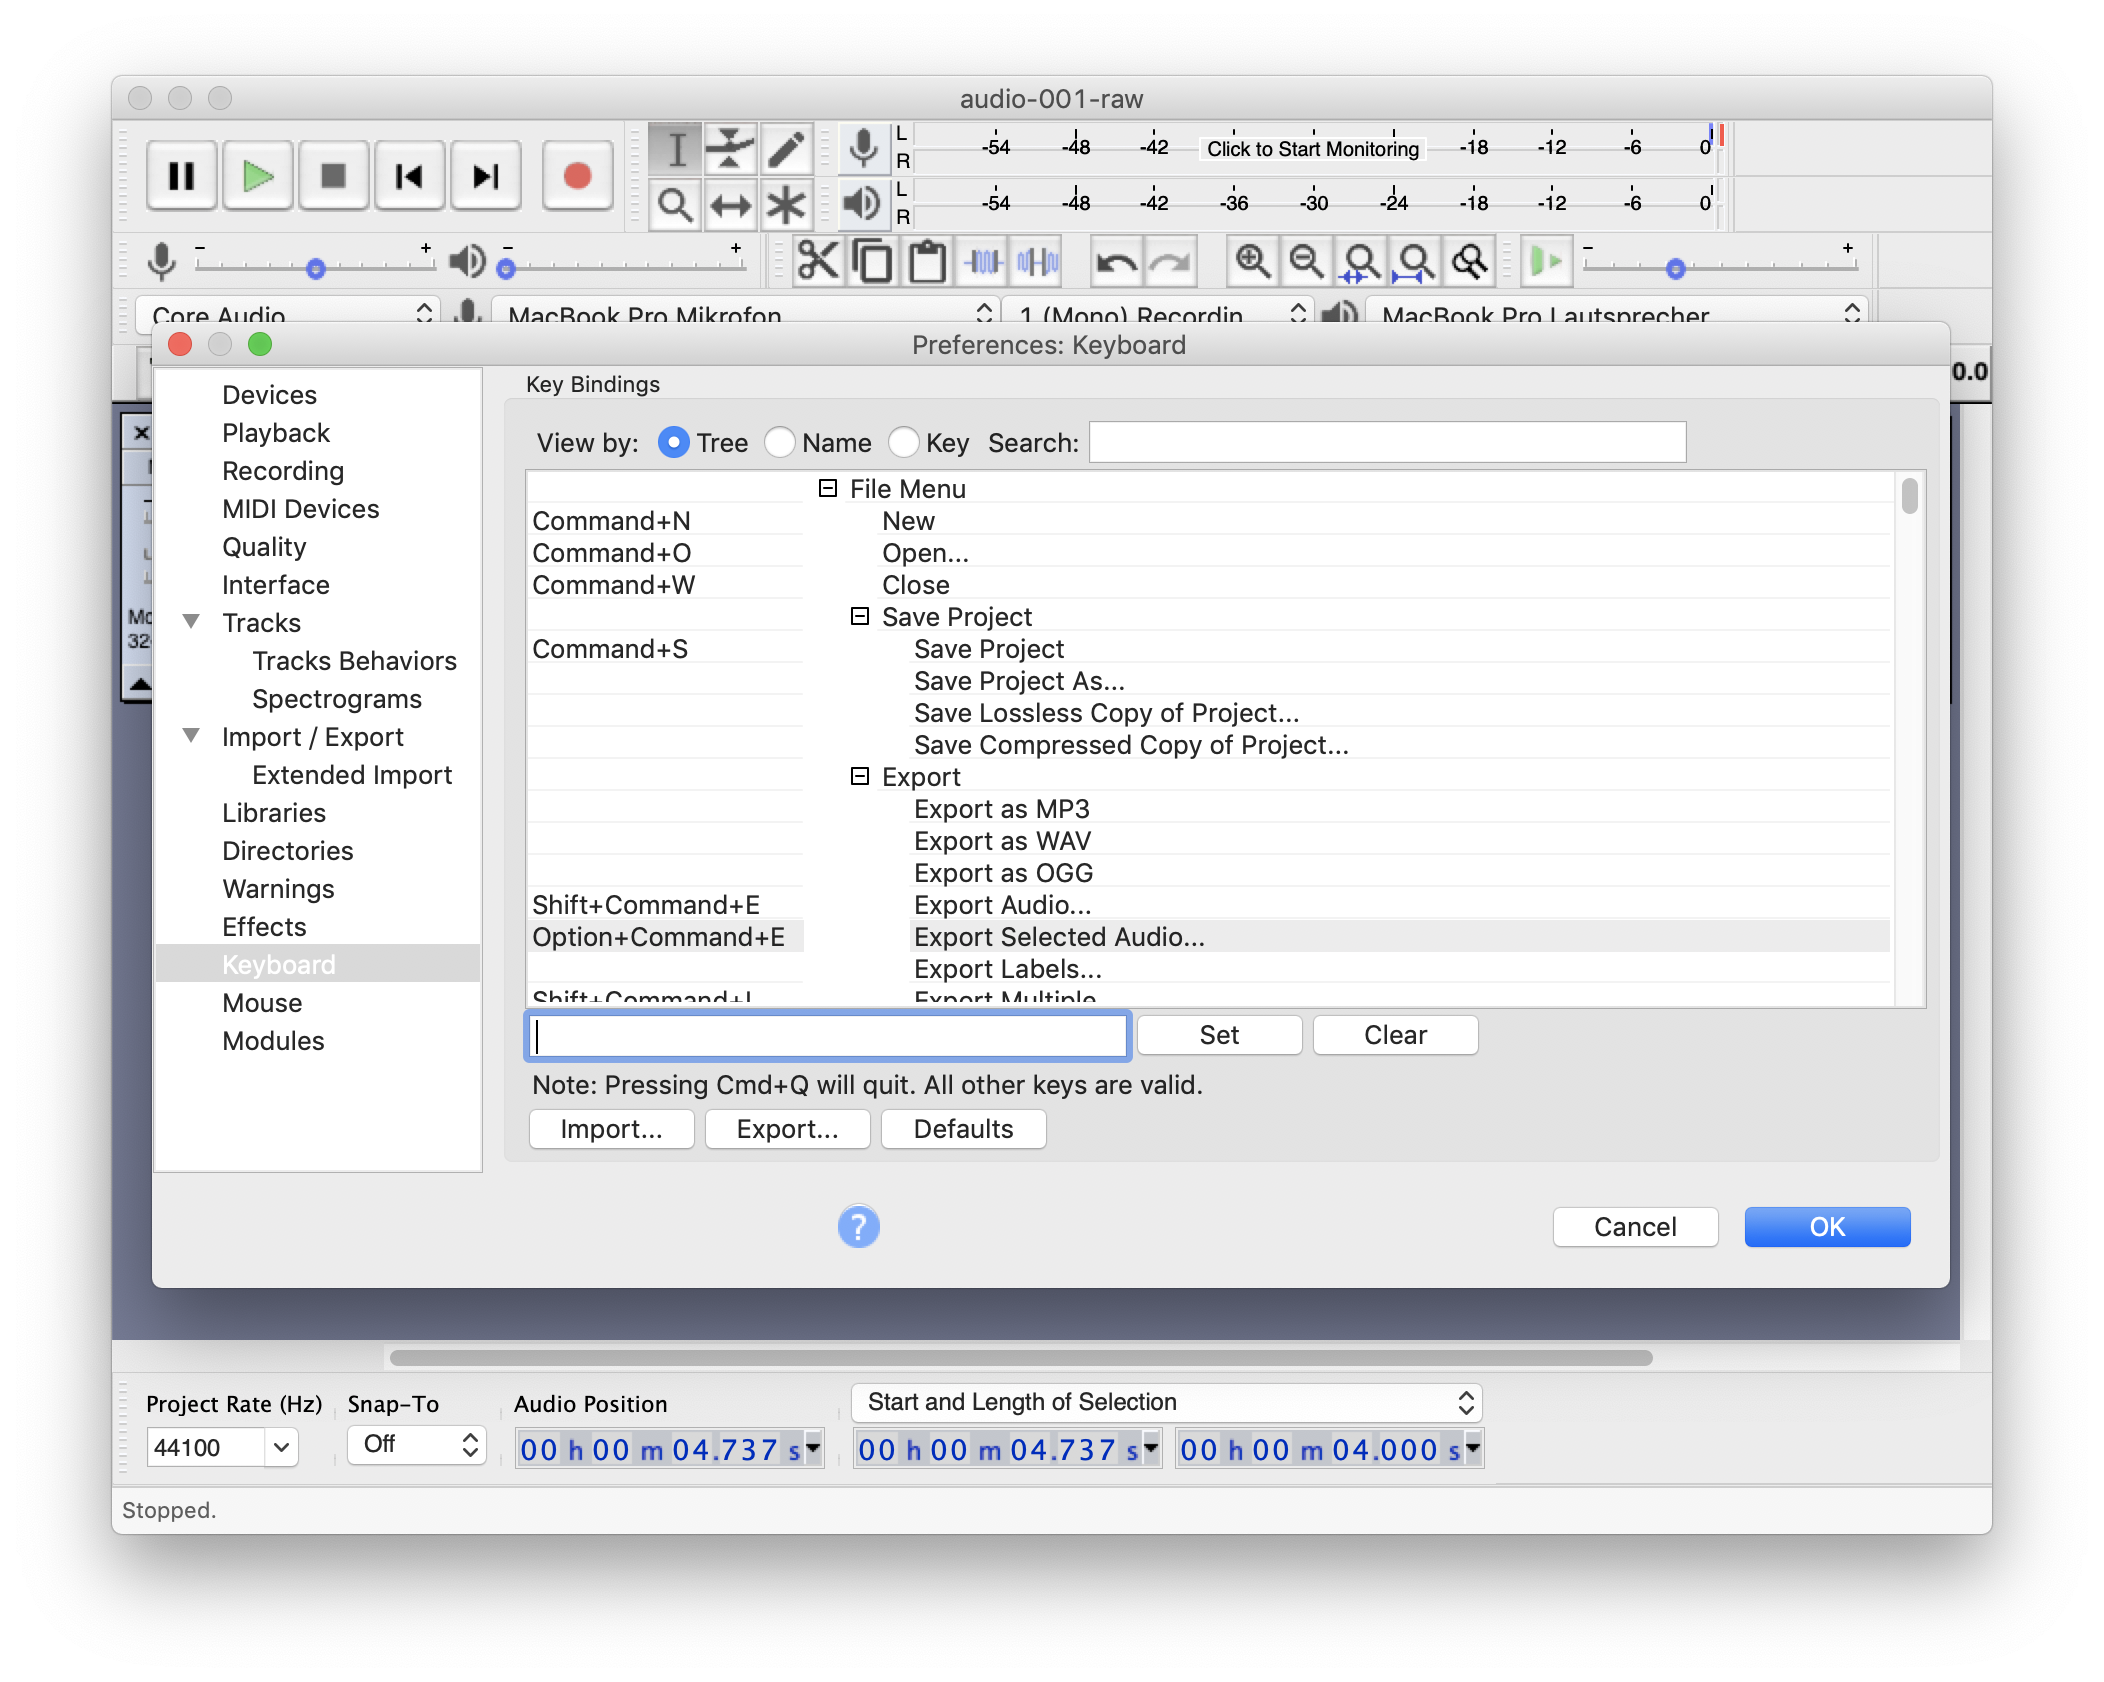
Fig. 19 Add a keyboard shortcut for a menu entry, in this case “Export Selected Audio…”. The available keys (and shortcuts) will differ depending on your operating system. The choice here was deliberately similar to the keyboard shortcut for exporting the complete audio trace, but feel free to use your own.
To add the desired keyboard shortcut, select the “Export Selected Audio…” menu entry and afterwards the text box left of the “Set” button. Type the keyboard shortcut you want to assign and afterwards press the “Set” button. As you see, here, we’ve used the Option + Cmd + E keyboard shortcut, quite similar to the one for exporting the whole audio trace.
That’s it for this short introduction to using Audacity for recording and cutting the audio for a webcast. Enjoy, play around, and share both, your webcasts and gained knowledge with others.