Install Tiny Webcasts on macOS
Users of the macOS operating system are recommended to install Tiny Webcasts using the Docker image provided. Therefore, installing Tiny Webcasts is a two-step process:
Download and install Docker for macOS
Download and install Tiny Webcasts
However, those more familiar with the command-line features of macOS (probably those coming from the *nix world) may want to have a look at the direct install.
Download and install Docker for macOS
In order to build and use the Docker image provided with “Tiny Webcasts”, you need to install Docker for your platform. Follow the instructions on the Docker website and make sure your Docker installation is working.
There is a detailed and step-by-step guide for the Docker installation for macOS available on the official Docker website. Expect to download a larger file (probably more than one Gigabyte). However, it is worth it, as you can use Docker for many other things as well.
Once you’ve downloaded and installed Docker, test that everything is well setup and working. To do so, open a terminal and type the following into it (and afterwards, hit the “Enter” key):
docker run hello-world
This should usually present you with a welcome message and tell you that your Docker installation was successful and everthing seems working.
If however you see some error messages, refer to the official Docker documentation and trouble-shoot accordingly.
Important
Please refer to the information available on the Docker website for any questions regarding the installation of Docker for your platform. There will be no support by the authors of “Tiny Webcasts” regarding those questions.
Download and install Tiny Webcasts
The Tiny Webcasts command-line tools used for creating the webcasts can be obtained from GitHub. Just download and unpack the project from there:
Note
Instead of simply downloading the master branch, it might be advisable to look at the releases and download the latest (stable) release.
For those interested in a more graphical approach:
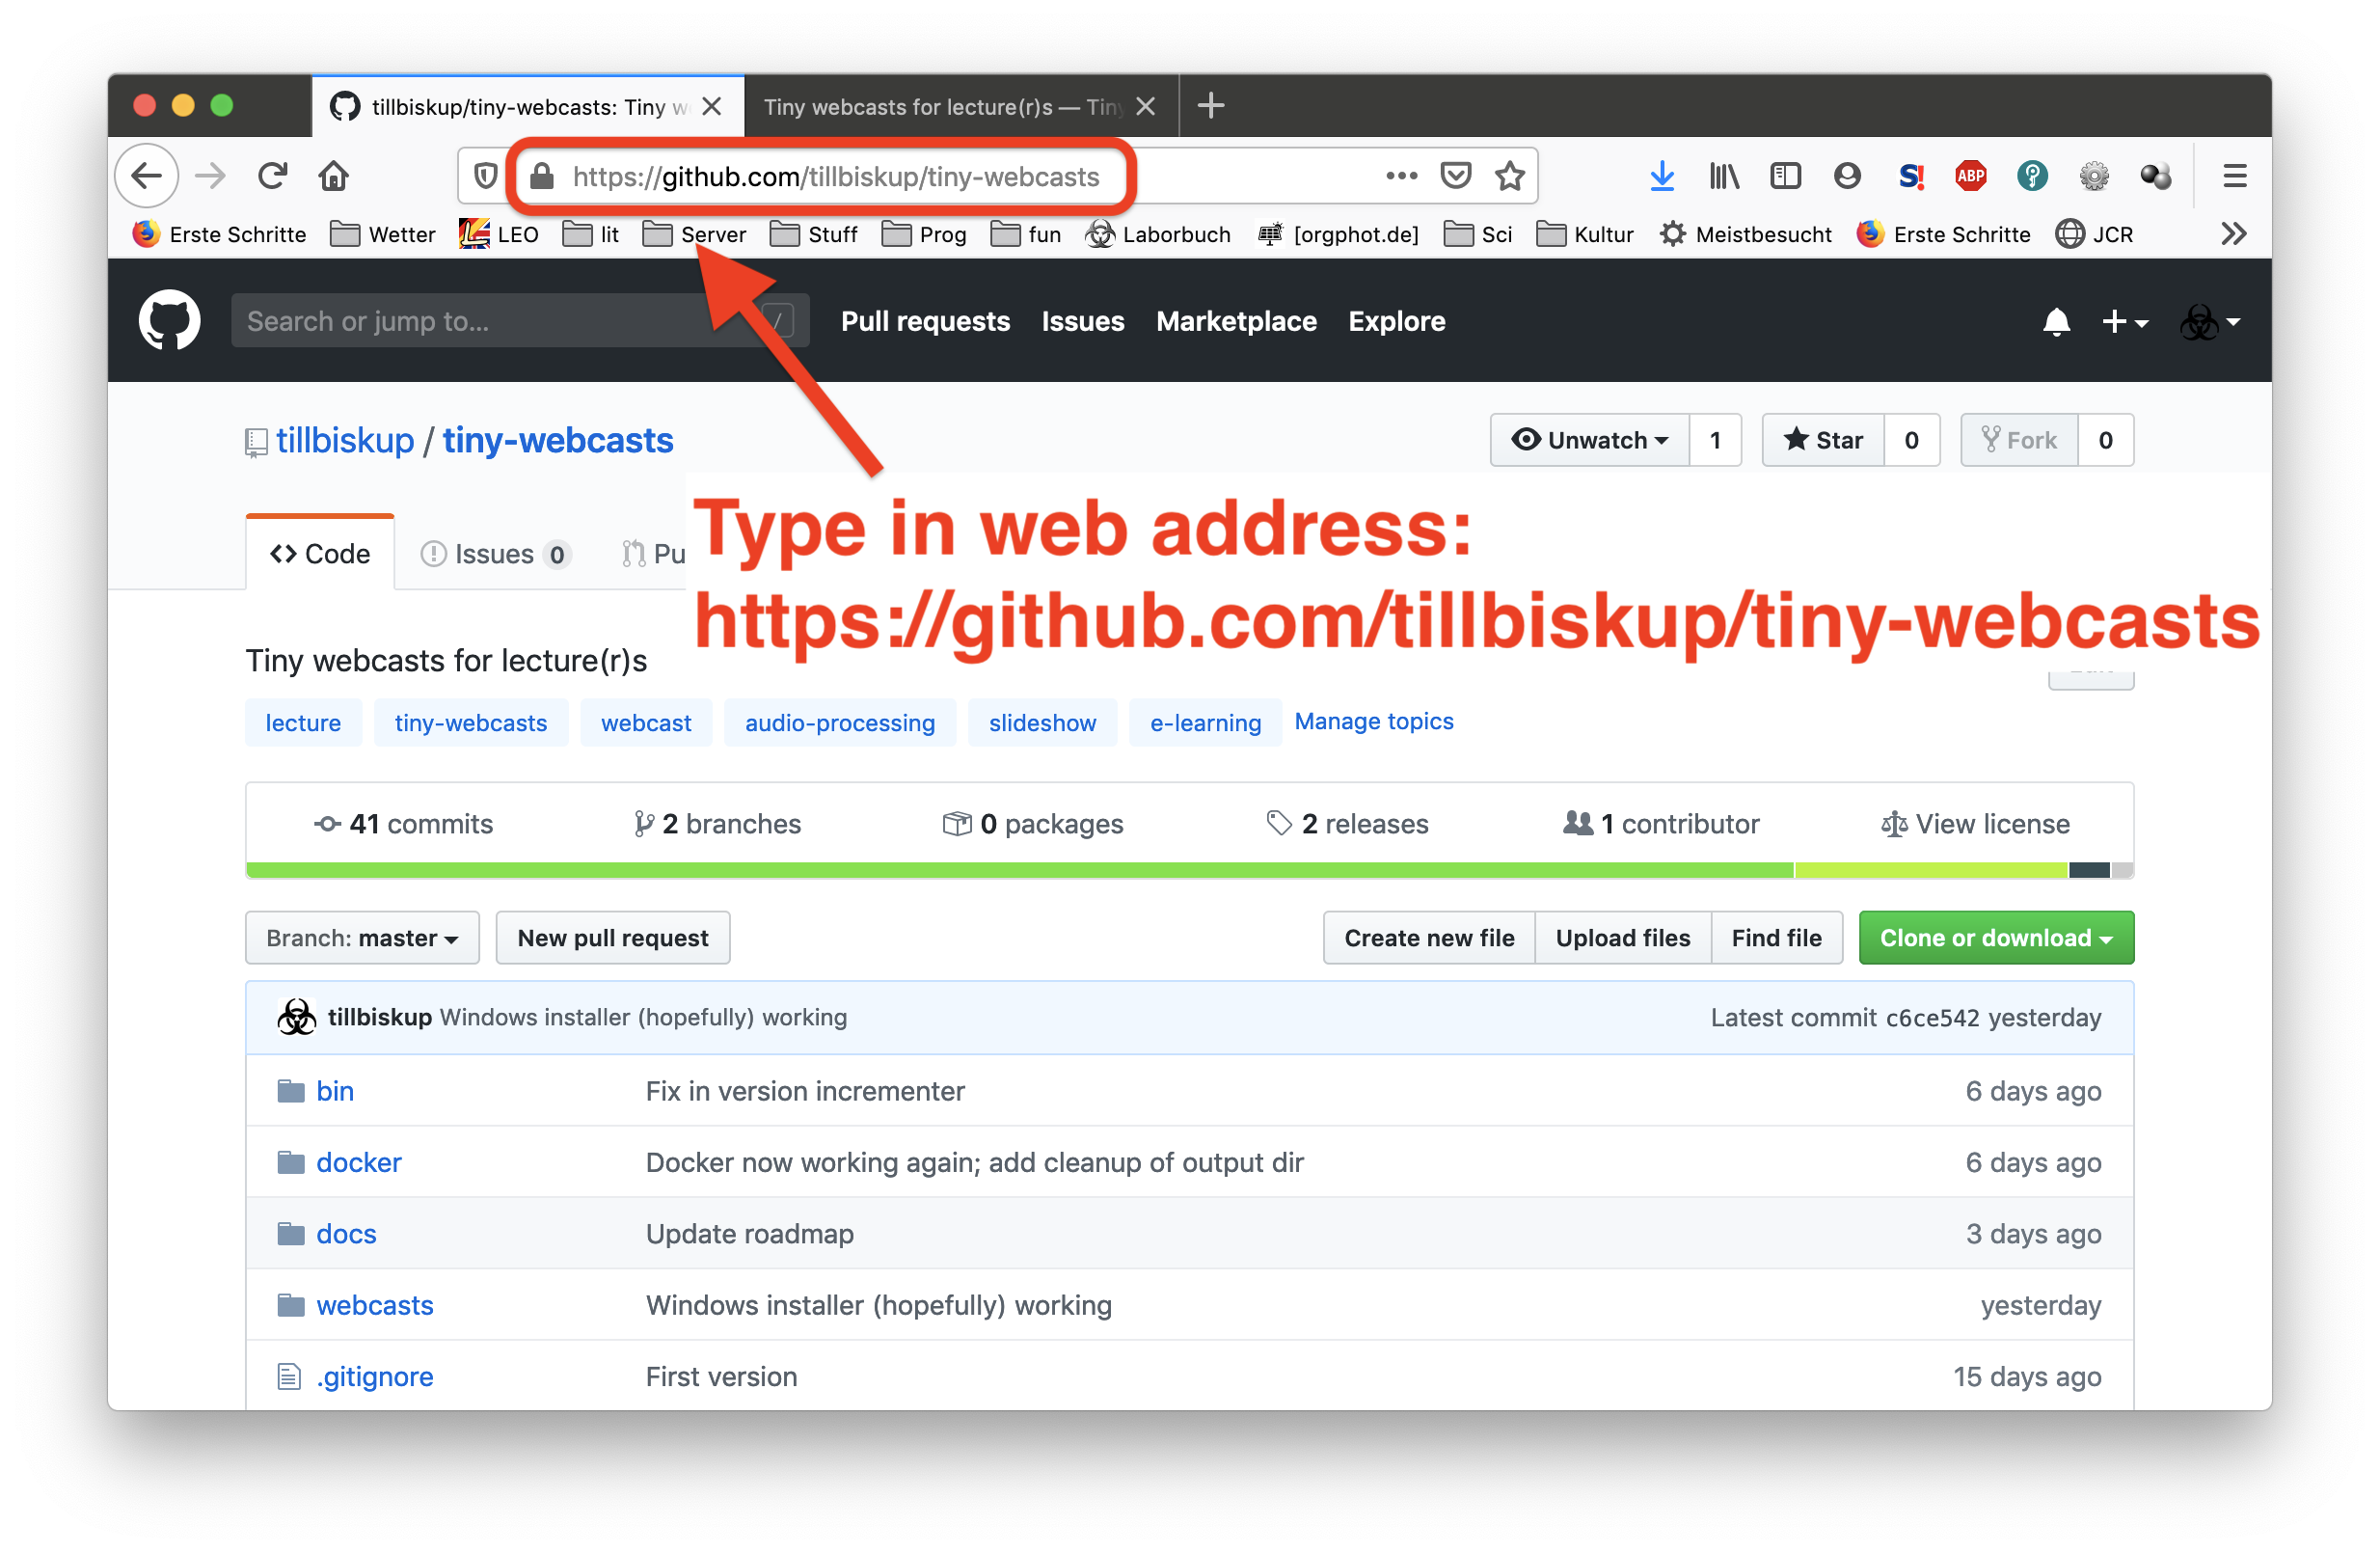
Fig. 4 Open the GitHub webpage for Tiny Webcasts in your favourite browser. Therefore, start your browser, simply type https://github.com/tillbiskup/tiny-webcasts into its address bar, and hit the Enter key. This should open the respective webpage as shown here.
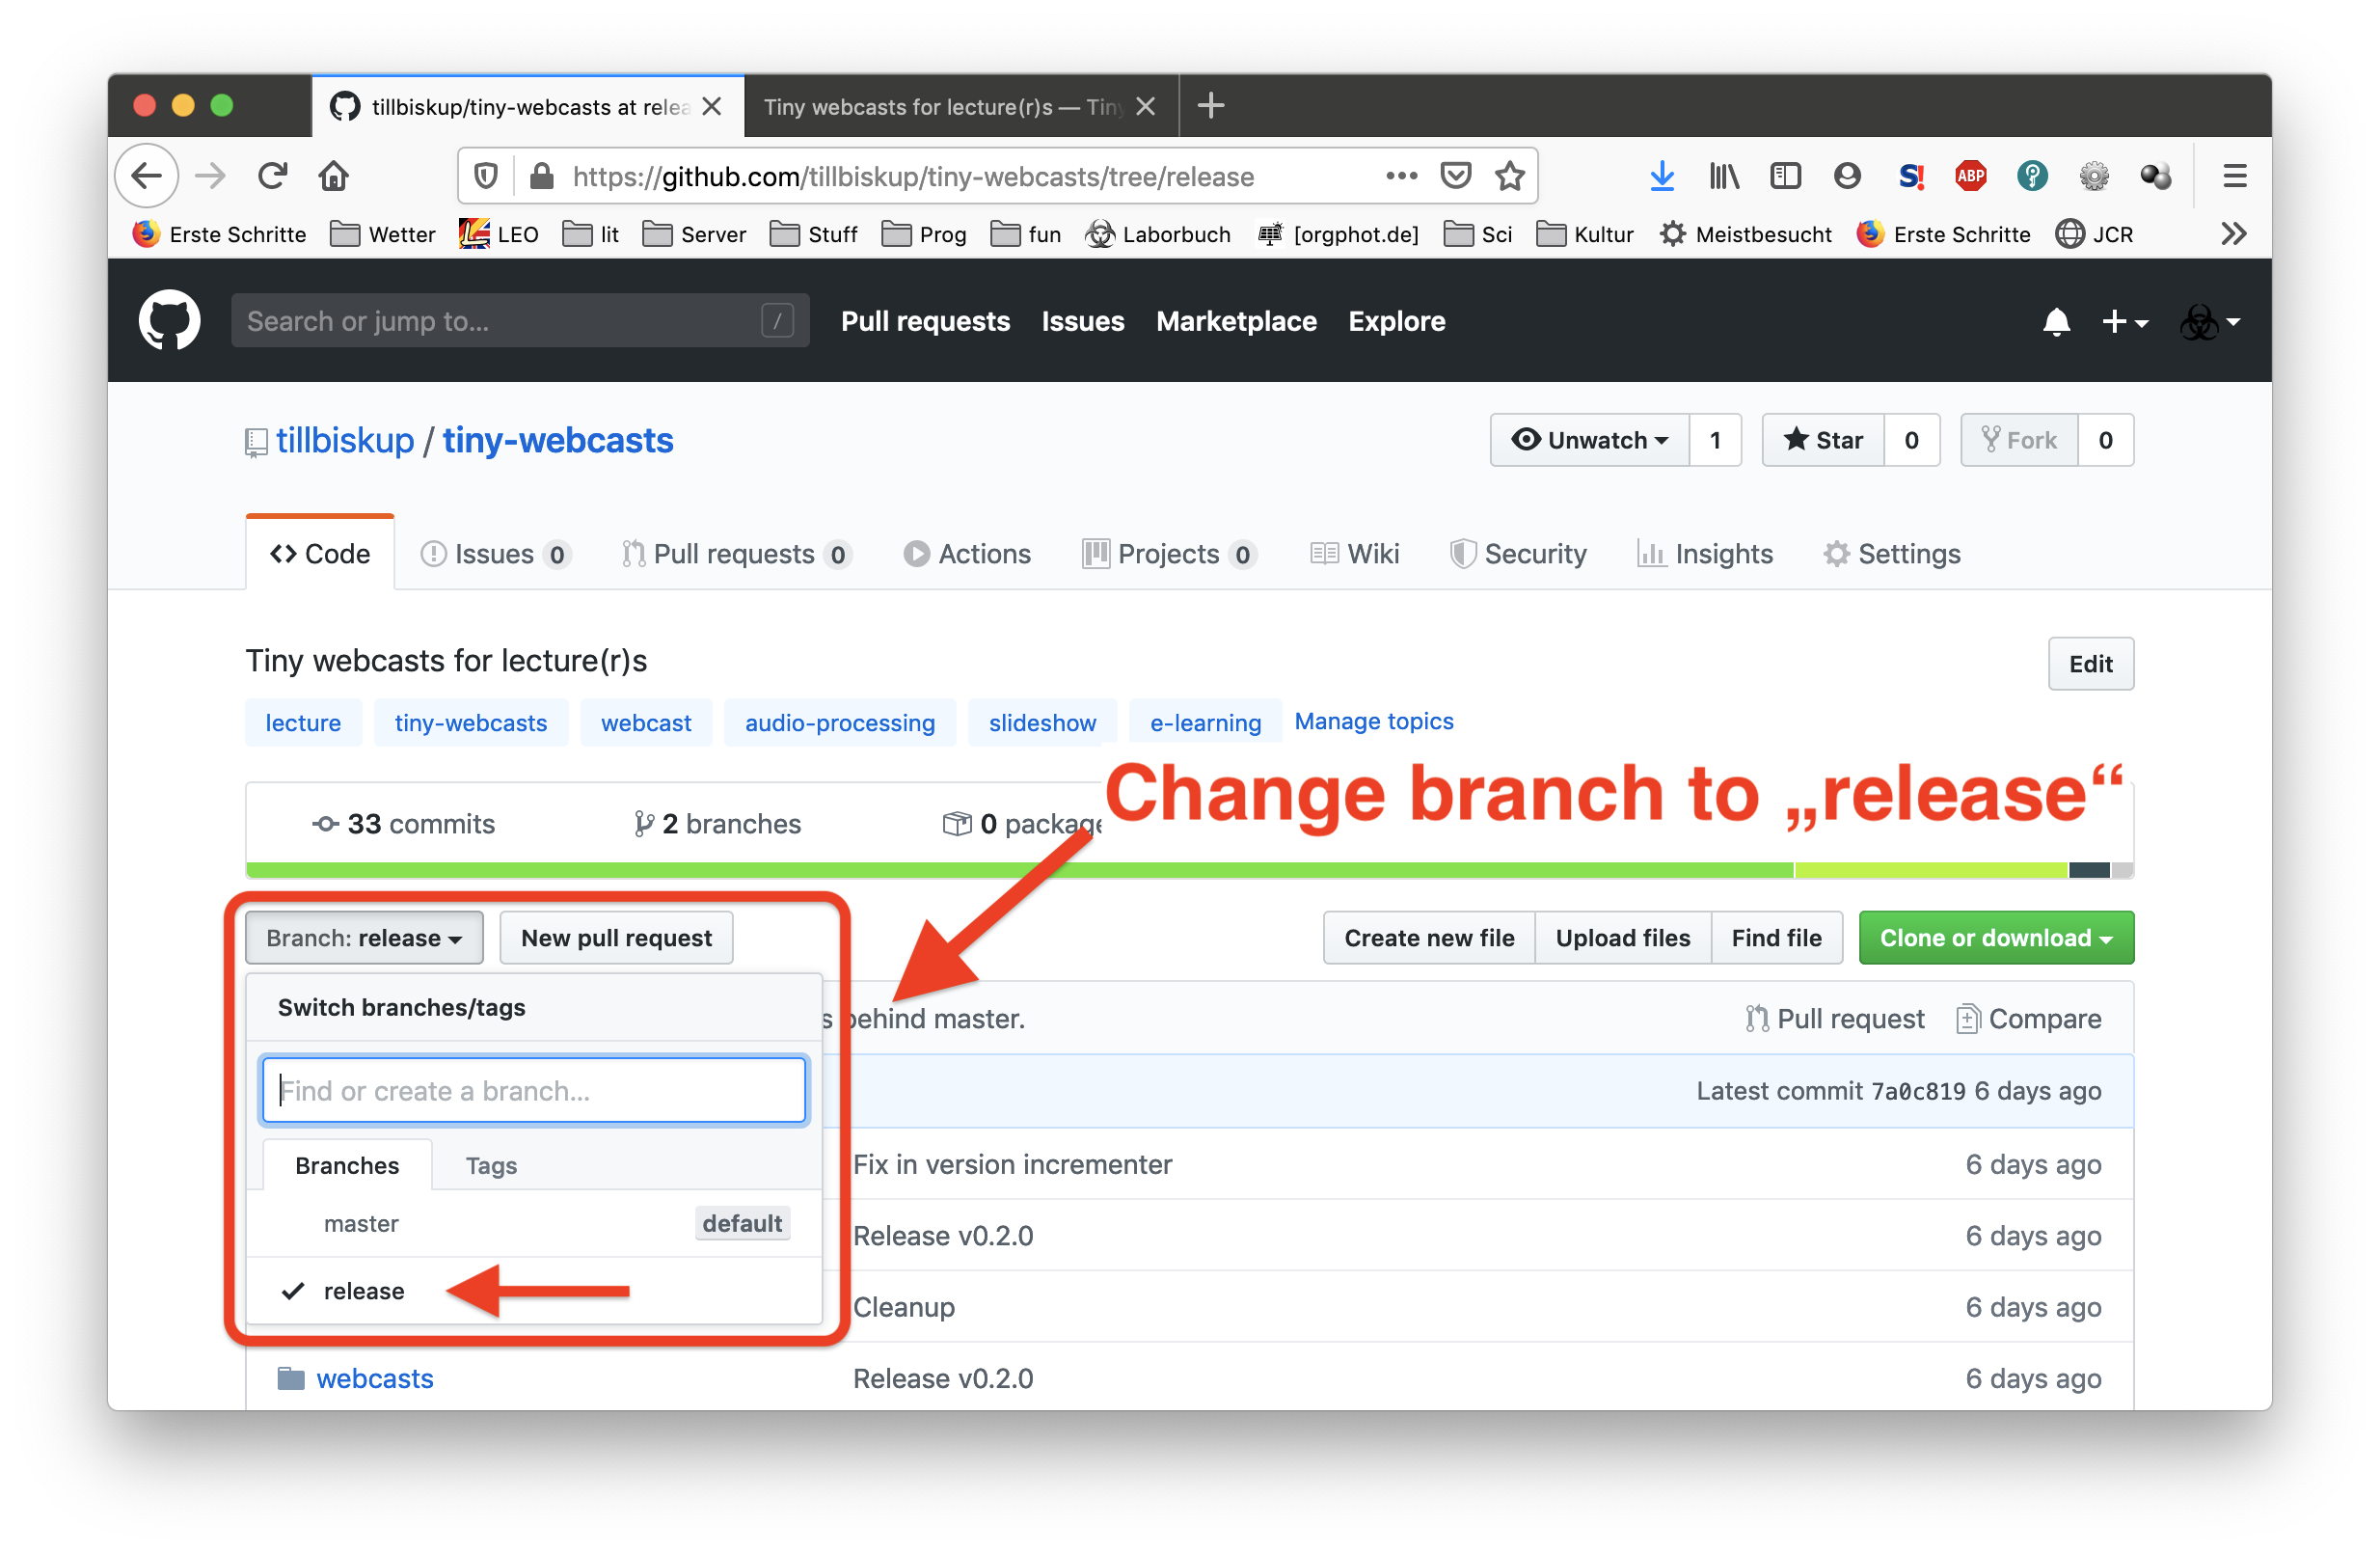
Fig. 5 In a next step, change to the “release” branch, as this will provide you with the latest stable release. Therefore, click on the button on the left labelled “Branch” and select “release” from the list, as shown.
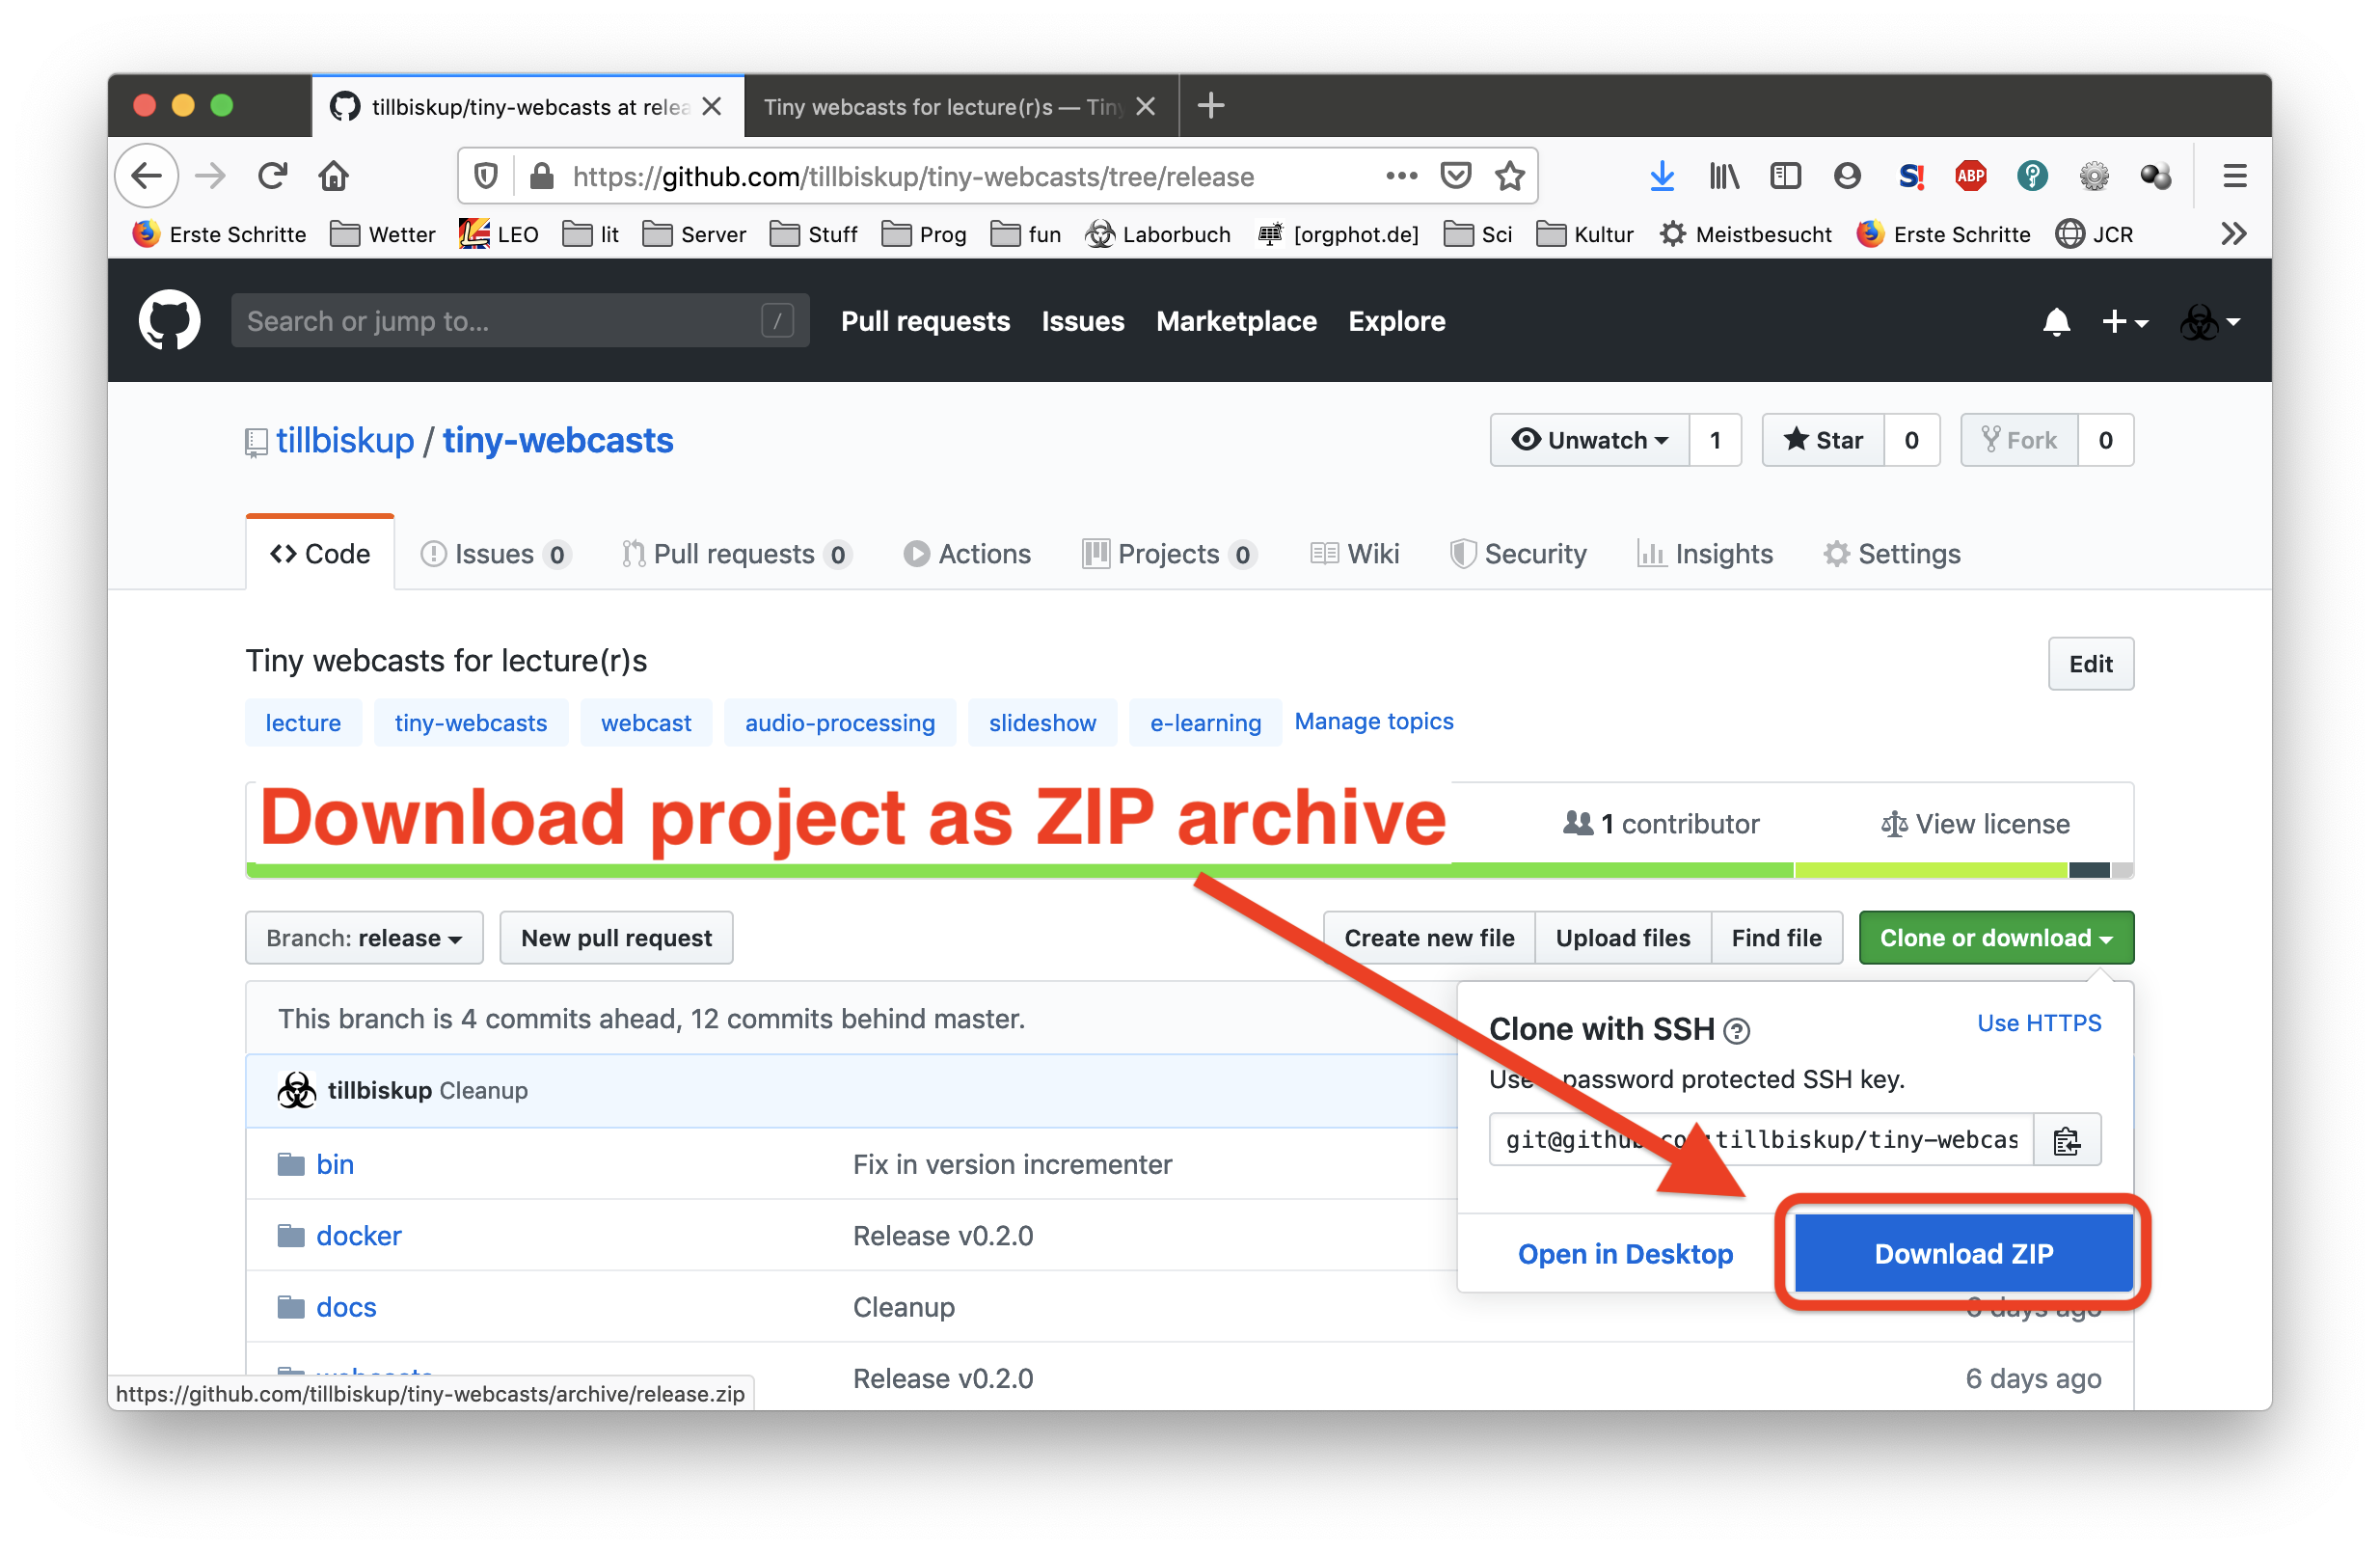
Fig. 6 Finally, download the ZIP archive by pressing the green button “Clone or download” on the right and clicking “Download ZIP” afterwards. Next, a dialogue will pop up asking you how to proceed. Select “Open with Archive Utility” and proceed as normal for a ZIP archive.
Run the installer
Tiny Webcasts comes with an installer that helps you getting everything setup. It is named twc-install-docker.sh and lives inside the webcasts directory of the directory you’ve just downloaded and unpacked Tiny Webcasts to.
The installer will do two things for you:
Build the docker image
Install a small script file named
twcto thebindirectory in your user directory and add that directory to the path (if necessary)
To install Tiny Webcasts, open a terminal, change directory to the directory you’ve downloaded and unpacked Tiny Webcasts to, change to the webcasts subdirectory, and type the following into it (and afterwards, hit the “Enter” key):
./twc-install-docker.sh
Note
There are ways to open a terminal in macOS directly within a certain directory. Therefore, locate the directory in a Finder window, right-click on the directory and select “Services” > “New Terminal At Folder”.
The output of this command is a bit lengthly, as it includes building the docker image. It should look similar to the following:
Sending build context to Docker daemon  38.96MB
Step 1/7 : FROM alpine
latest: Pulling from library/alpine
Digest: sha256:b276d875eeed9c7d3f1cfa7edb06b22ed22b14219a7d67c52c56612330348239
Status: Image is up to date for alpine:latest
 ---> a187dde48cd2
Step 2/7 : RUN apk --no-cache --update add bash         ffmpeg  sox     flac    imagemagick     poppler-utils
 ---> Using cache
 ---> a5feb5e63d2e
Step 3/7 : COPY webcasts/ /usr/local/webcasts/
 ---> Using cache
 ---> e11de3151254
Step 4/7 : COPY docker/docker-entrypoint.sh /usr/local/bin/
 ---> Using cache
 ---> 0f75bb6c8a9b
Step 5/7 : RUN cd /usr/local/webcasts/functions/; ./generate-combine-user-chaptermetadata-times-awk-function.sh > combine-user-chaptermetadata-times.sh
 ---> Using cache
 ---> d531da265065
Step 6/7 : RUN cd /usr/local/webcasts/; targetFile=twc; (echo '#!/bin/bash'; cat `ls functions/*sh | grep -v 'awk'` | grep -v '^#!/bin/bash'; grep -v '^#!/bin/bash' twc.sh) > ${targetFile}; chmod +x ${targetFile}; mv ${targetFile} /usr/local/bin/
 ---> Running in 0ad94cbe3eb6
Removing intermediate container 0ad94cbe3eb6
 ---> c077dc5bfe42
Step 7/7 : ENTRYPOINT ["/usr/local/bin/docker-entrypoint.sh"]
 ---> Running in 63cc9885c6a0
Removing intermediate container 63cc9885c6a0
 ---> e446af9b4da8
Successfully built e446af9b4da8
Successfully tagged twc:latest

Installing 'twc' script to /Users/till/bin/ was successful.
You may now create tiny webcasts by calling 'twc' from anyhwere.
Depending on whether you have installed the image previously, there will be much more output lines from building the original image and container.
Important
If you see the message You need to open a new terminal for the changes to take effect..., please do as been told before continuing to work with the tiny webcasts scripts. Otherwise, you will not be able to access the scripts from everywhere.
For those again interested in a more graphical approach:
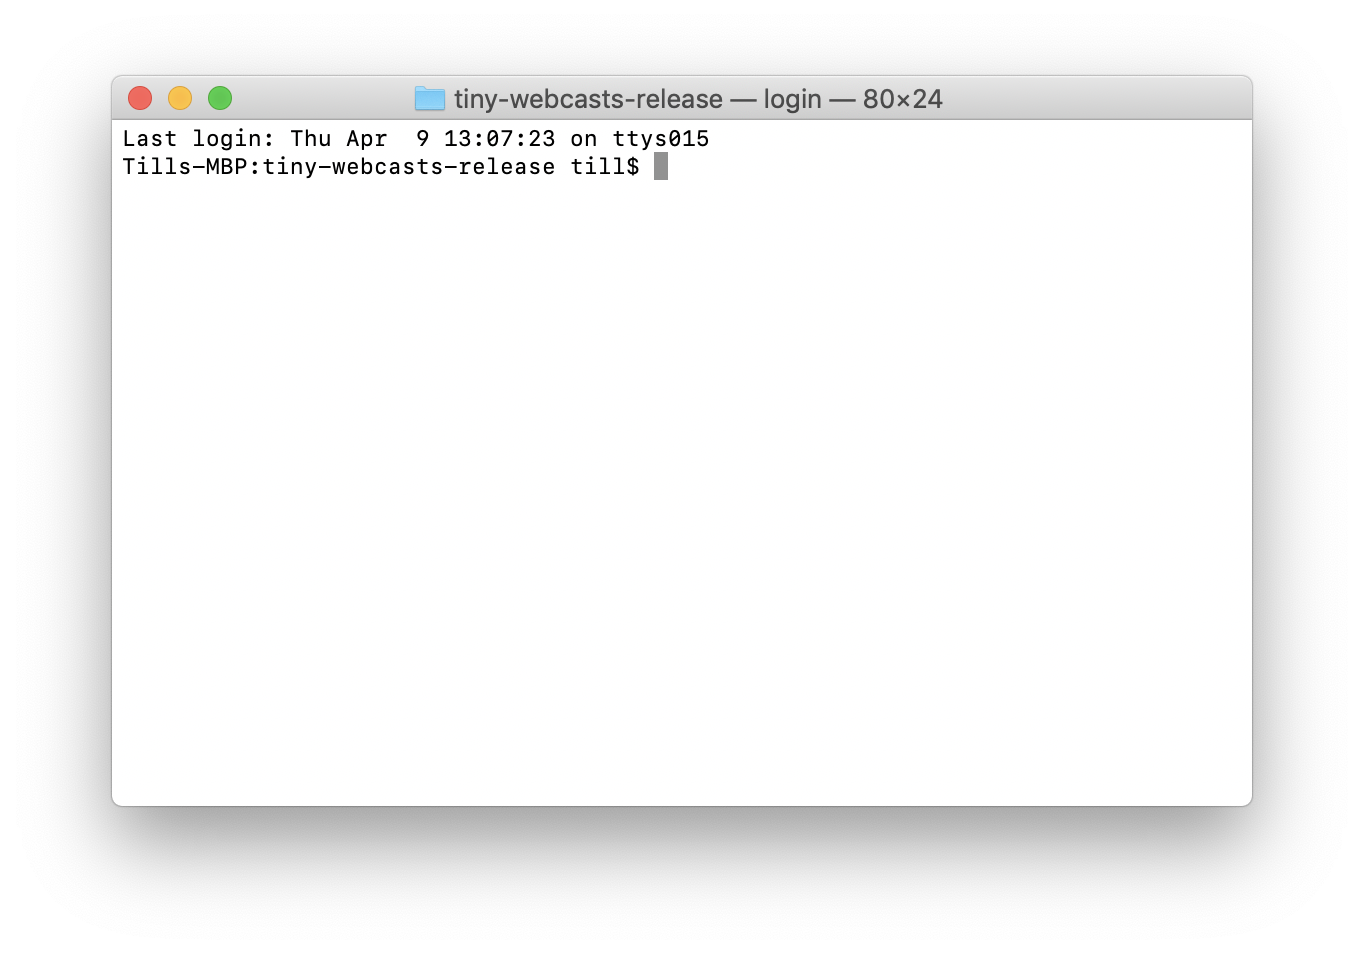
Fig. 7 First, open a terminal in the directory you’ve downloaded and unpacked the Tiny Webcasts project to. The easiest is to right-click on the folder in the Finder window and select “Services” > “New Terminal At Folder”. For more details see the FAQ to opening a terminal on macOS.
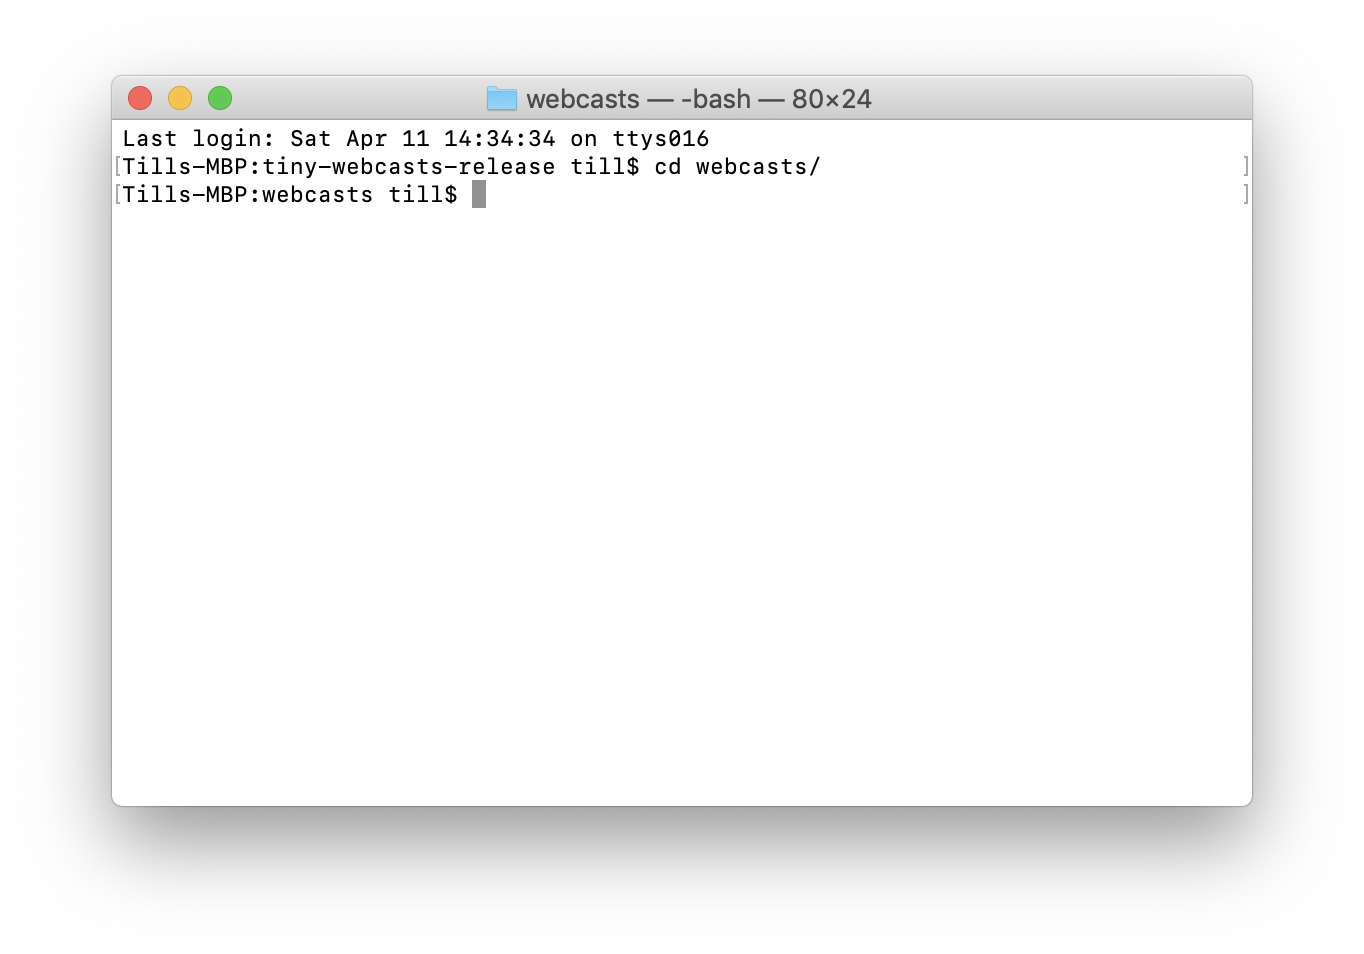
Fig. 8 Next, change directory into the webcasts subdirectory by issuing the command cd webcasts. Don’t forget to hit Enter afterwards.

Fig. 9 Next, run the installer by typing ./twc-docker-install.sh. Mind the ./ at the beginning and don’t forget to hit Enter afterwards.
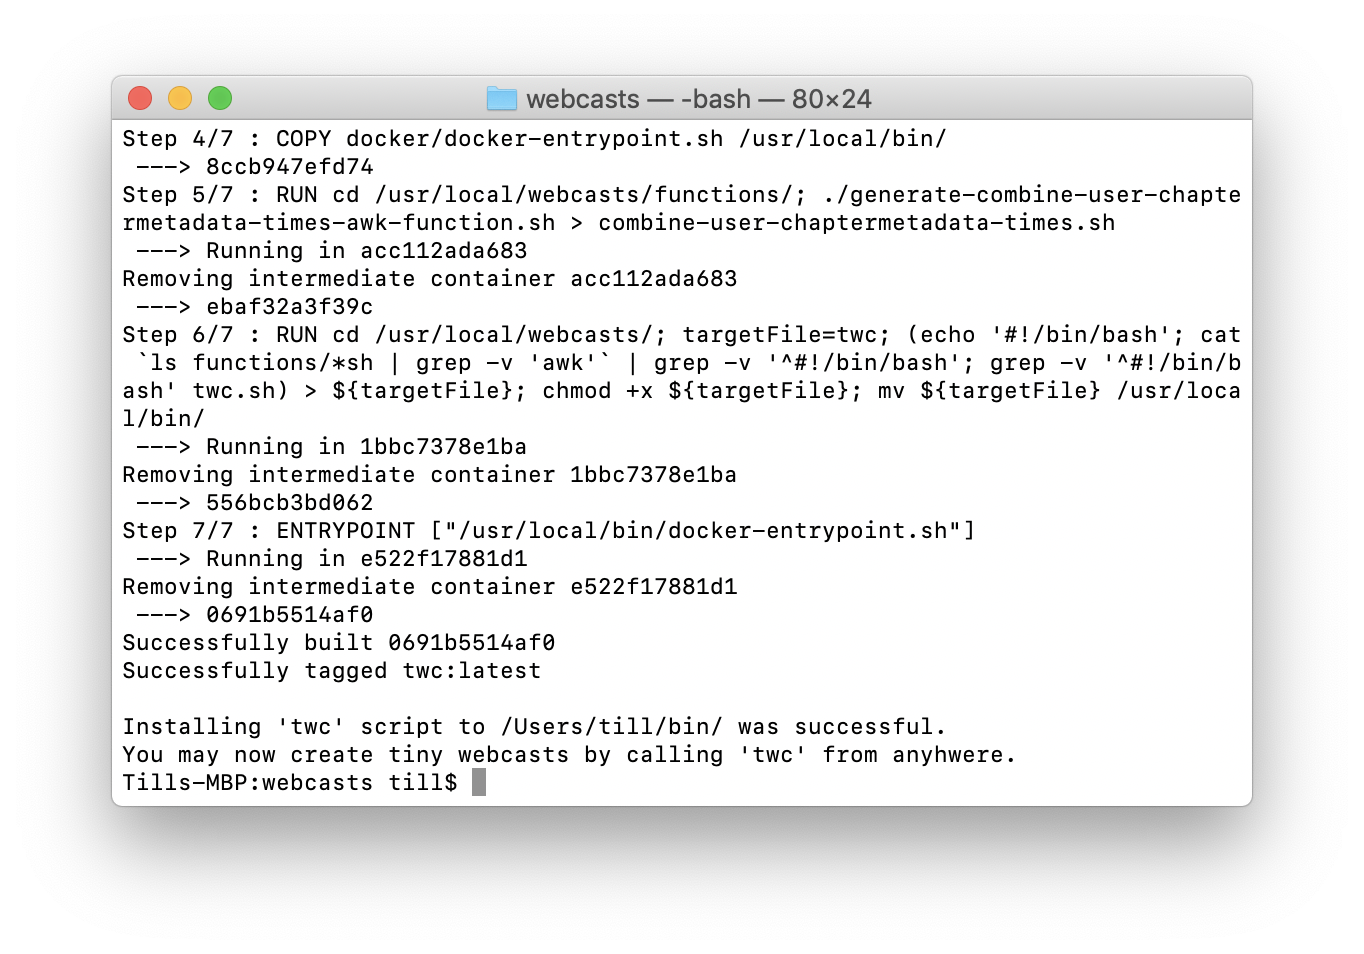
Fig. 10 The installer will first build the Docker image for you, resulting in a few more lines of output. Important, however, is the final message shown here telling you that you can now access twc, the command-line tool of Tiny Webcasts, from everywhere.
Congratulations! Now you’re ready to create your first webcast.
Direct install
Note
The following description addresses users more familiar with their operating system and with the terminal/command line. Others are highly recommended to use the Docker image and the installation method described above. Those who continue reading: you have been warned…
Running the Tiny Webcasts command-line tools directly on your machine rather than in the Docker container provided, you need to install a series of command-line programs freely available for macOS (via the Homebrew package manager). For details, see the “Requirements” page and install all the required programs before continuing.
To directly install the twc command-line tools, open a terminal, change directory to the directory you’ve downloaded and unpacked Tiny Webcasts to, change to the webcasts subdirectory, and type the following into it (and afterwards, hit the “Enter” key):
./twc-install.sh
If it was successful, you should see the message:
Installing twc scripts to /<path_to_users_home_dir>/bin/ was successful.
You may now create tiny webcasts by calling 'twc' from anyhwere.
with <path_to_users_home_dir> usually something like /Users/johndoe.
Important
If you see the message You need to open a new terminal for the changes to take effect..., please do as been told before continuing to work with the tiny webcasts scripts. Otherwise, you will not be able to access the scripts from everywhere.
Congratulations! Now you’re ready to create your first webcast.